ISO 15189:2022 Audit Guide – How to Pass First Time
ISO 15189:2022 Audit Guide – How to Pass First Time
Last Updated on October 22, 2025 by Hafsa J.
Your Complete Roadmap to a Successful ISO 15189:2022 Audit
Preparing for an ISO 15189:2022 accreditation audit can feel overwhelming — not because the standard itself is unclear, but because of the sheer volume of evidence, traceability, and confidence it demands.
Most laboratories already run reliable operations. What they often lack is a structured way to prove that reliability under assessment conditions.
This pillar article brings everything together. It’s designed as a full audit roadmap for medical laboratories seeking first-time ISO 15189:2022 accreditation — practical, sequential, and evidence-driven.
You’ll learn exactly what assessors look for, how to prepare your system before they arrive, and how to manage findings in a way that strengthens your credibility rather than exposing weaknesses.
Each section breaks down the audit lifecycle — from internal preparation to closing corrective actions — so your lab can approach the accreditation process with confidence, clarity, and control.
QSE Academy’s experience guiding laboratories through successful ISO 15189 transitions and assessments informs every step here. The focus isn’t on passing by chance, but on building an audit-ready culture that consistently meets and exceeds the standard’s expectations.
By the end, you’ll know how to:
-
Translate ISO 15189:2022 requirements into audit-ready evidence.
-
Organize documentation and records for seamless assessor review.
-
Handle interviews, findings, and CAPA follow-up without stress.
-
Turn the audit itself into proof of maturity and continual improvement.
If your goal is to pass the ISO 15189 audit the first time — and build a quality system that stands up to scrutiny — this guide gives you the exact structure to do it.
Understanding the ISO 15189:2022 Audit Process
Before you can prepare confidently, you need to understand what kind of audit you’re walking into.
ISO 15189 audits are not simply inspections — they’re structured evaluations designed to confirm that your laboratory consistently produces valid, reliable results.
Each audit step reveals something about your system’s maturity: how well your processes are documented, how your staff apply them, and how effectively your management system ensures ongoing improvement.
When you understand this process, you can plan your approach instead of reacting to surprises.
The Three Types of Audits You’ll Encounter
-
Internal Audits – Conducted by your own trained auditors.
Their purpose is to check that your operations align with ISO 15189 requirements and your documented procedures. Internal audits are your rehearsal — they uncover issues before assessors do. -
External Audits – These may include supplier or client audits.
They provide perspective on how your laboratory is performing in the wider quality chain. -
Accreditation Audits – Performed by the accreditation body.
This is the official assessment that determines whether your lab meets ISO 15189:2022 in practice.
Assessors will verify evidence across all clauses — from impartiality and resources to method validation, quality control, and continual improvement.
Each type has different expectations, but all share one goal: to evaluate whether your system produces accurate, repeatable, and defensible results.
Audit Objectives You Must Keep in Focus
-
Demonstrate competence: Evidence that staff, methods, and equipment produce valid results.
-
Verify consistency: Show that processes are applied the same way every time.
-
Evaluate improvement: Prove that findings, data, and reviews lead to measurable progress.
Pro Tip:
Map every clause (4 to 8) of ISO 15189:2022 against your audit schedule.
That single document shows assessors that you’ve thought through your coverage — no requirement left unverified.
What Assessors Look For
Assessors aren’t looking for perfection; they’re looking for control.
They’ll want to see that:
-
You know your processes and can explain them clearly.
-
Your records match your procedures.
-
Your staff understand their roles and can demonstrate competence.
-
You can identify, analyze, and correct issues when they arise.
When you show control — not just compliance — you build confidence.
How This Fits into the Accreditation Journey
Think of the audit process as a cycle, not an event:
-
Plan → 2. Prepare → 3. Perform → 4. Review → 5. Improve.
Every successful laboratory keeps this cycle active, using each audit to strengthen its quality system.
When you treat audits as checkpoints of improvement rather than tests to pass, the stress drops — and your system begins to work for you, not against you.
Pre-Audit Preparation: Setting the Foundation for Success
A smooth ISO 15189:2022 audit doesn’t start the week before the assessors arrive.
It starts months earlier — with a clear plan, organized evidence, and a team that knows exactly what’s expected.
Preparation isn’t just about paperwork; it’s about creating the conditions that let your system speak for itself.
1. Define the Audit Scope and Schedule
Start by clarifying what will be audited and who’s responsible.
Define the scope in measurable terms — for example, “all chemistry, hematology, and microbiology examinations covered under ISO 15189:2022.”
From there, set a timeline that includes internal audits, management review, and pre-assessment dates.
Pro Tip:
Don’t compress your preparation schedule. Build in at least four weeks between your final internal audit and the accreditation visit — that window lets you implement and verify any corrective actions.
2. Review and Update Documentation
Before any audit, your documents should match the way you actually operate.
Cross-check your Quality Manual, SOPs, and work instructions against current practice.
Ensure every form, record, and controlled document carries the latest revision number and approval signature.
Create a Document Control Index — it’s one of the first things assessors ask to see.
This single table proves you know what version is in use, where it’s stored, and who owns it.
3. Conduct a Gap Analysis
A gap analysis is your blueprint for readiness.
Compare your system clause-by-clause against ISO 15189:2022 requirements.
Mark each item as Compliant, Partially Compliant, or Needs Action.
Focus on high-risk gaps first — areas affecting patient results, method validation, or QC performance.
Update your action tracker and assign owners with clear deadlines.
Pro Tip:
Keep your gap-analysis summary to one page for management. Assessors appreciate concise, data-driven evidence of oversight.
4. Verify Technical and Resource Readiness
Your lab’s technical backbone — equipment, reagents, and personnel — must all be audit-ready.
Check that:
-
Equipment calibration and maintenance records are current.
-
Staff competency assessments are up-to-date.
-
Proficiency testing and EQA reports are available with CAPA evidence attached.
-
Reference materials, control samples, and method-validation data are traceable.
One missing calibration certificate can raise more questions than an entire clause.
5. Organize Your Audit-Readiness Binder (or Dashboard)
Create a centralized binder — digital or printed — that includes:
-
Quality Manual and policy statements
-
Scope of accreditation
-
Organization chart and job descriptions
-
Internal audit plan and latest reports
-
CAPA summary log
-
Management review minutes
-
EQA/PT performance summaries
This binder becomes your “go-to” during the audit, saving time and reducing stress.
6. Prepare Your Team
Hold a short pre-audit briefing.
Explain what assessors may ask, remind staff to answer based on experience, and reassure them that honesty builds credibility.
If possible, conduct short role-play interviews — it’s one of the simplest ways to boost confidence.
Pro Tip:
Remind everyone: it’s perfectly fine to say “Let me show you the record” instead of guessing an answer.
Evidence always speaks louder than memory.
When preparation is structured, your audit doesn’t feel like a test — it feels like a presentation of how your lab operates every day.
That level of readiness not only prevents surprises, it sets the tone for a professional, well-controlled audit from the moment the assessors walk in.
Internal Audits: Your Best Practice Run
An internal audit is your rehearsal for accreditation — the moment you test your system before anyone else does.
It’s where you identify weaknesses under your own control, long before an external assessor turns them into findings.
Handled well, internal audits build confidence, competence, and credibility across your entire laboratory.
1. Understand the Purpose of Internal Audits
Internal audits exist to verify two things:
-
That your laboratory complies with ISO 15189:2022 requirements.
-
That your procedures are being followed as written and remain effective.
They’re not about blame or inspection. They’re a structured review — your internal assurance that the quality system you’ve built actually works.
2. Build a Clear Audit Plan
Plan your audits so that all clauses of ISO 15189:2022 (from Clause 4 to 8) are covered across the year.
Each department should be audited at least once per cycle.
Include in your plan:
-
Audit scope and objectives
-
Responsible auditors
-
Timeline and frequency
-
References to relevant procedures or clauses
Pro Tip:
Rotate auditors between departments.
It keeps the process impartial and encourages cross-functional understanding.
3. Prepare and Use Structured Audit Checklists
Checklists keep your audit consistent, clause-aligned, and evidence-based.
They help ensure nothing is overlooked and keep the discussion objective.
Good checklists should include:
-
Clause reference
-
Question or requirement
-
Evidence verified
-
Auditor comments and findings
Example:
Clause 7.7: Post-examination procedures
“Are results verified, authorized, and released following approved policy?”
Evidence: Reviewed three result logs and LIS authorization records.
Pro Tip:
Tailor your checklist to your lab’s operations — don’t copy a generic template.
Assessors notice when your internal audit tools reflect your real workflow.
4. Report and Classify Findings
Once your audit is complete, summarize your findings clearly:
-
Conformities: where processes fully meet requirements
-
Observations: minor concerns or potential risks
-
Non-conformities: actual deviations that require corrective action
Record each non-conformity in your CAPA tracker with root-cause analysis and action owners assigned.
Follow the same process you’d use for an external audit — consistency here builds reliability later.
5. Communicate Results and Drive Improvement
Share audit results with department heads and management.
The goal isn’t to assign blame but to agree on actions and timelines.
Schedule follow-up audits to verify closure of findings and demonstrate continuous improvement.
Pro Tip:
Track closure rates for internal findings — a simple KPI that shows your system’s responsiveness and discipline.
6. Keep Evidence Ready
File all audit plans, checklists, reports, and CAPA follow-ups in one place.
During accreditation, assessors often ask:
“Show me how you conduct your internal audits.”
Being able to pull out a complete, well-organized file instantly shows maturity.
Internal audits are your most powerful preparation tool.
They give you the freedom to find and fix problems early, reinforce team accountability, and prove that your laboratory’s quality system isn’t just compliant — it’s under control.
Top Non-Conformities Found in ISO 15189:2022 Audits
Every audit reveals patterns. Even the most diligent laboratories tend to stumble over the same few issues — not because of neglect, but because these areas demand constant attention.
Understanding these recurring non-conformities gives you a major advantage: you can fix them before assessors ever see them.
Below are the most frequent weak spots in ISO 15189:2022 assessments, organized by clause area.
1. Clause 5 – Structural Requirements
Typical findings
-
Unclear reporting lines or incomplete organization charts.
-
Role descriptions missing for key technical staff.
-
Conflicts of interest not documented or formally reviewed.
How to avoid them
Keep your organizational chart current and signed by management.
Update job descriptions annually and include responsibilities for impartiality and confidentiality.
Pro Tip:
Have a one-page “Responsibility Matrix” showing who approves, reviews, and authorizes each activity — assessors appreciate that clarity.
2. Clause 6 – Resource Requirements
Typical findings
-
Staff competency evaluations not current or missing objective criteria.
-
Equipment calibration or maintenance records incomplete.
-
Reagents used beyond expiry or not logged properly.
How to avoid them
Schedule recurring reminders for calibration, maintenance, and retraining.
Document every action with traceable evidence — certificates, attendance sheets, or calibration reports.
Common mistake:
Treating training as a one-time event. ISO 15189 expects continuous competence evaluation, not just initial training.
3. Clause 7 – Process Requirements
Typical findings
-
Sample reception or identification procedures inconsistently followed.
-
Quality-control (QC) or EQA records missing trend analysis or corrective actions.
-
Method validation data incomplete or not linked to performance claims.
How to avoid them
Follow the “as for patient samples” rule — every QC and EQA event must follow normal procedures.
Keep validation summaries concise but complete, showing acceptance criteria and approval signatures.
Pro Tip:
Use a single “Analytical Method Summary Sheet” for each test — validation data, uncertainty, QC limits, and revision date all in one place.
4. Clause 8 – Management System Requirements
Typical findings
-
CAPA records incomplete or lacking verification of effectiveness.
-
Risk management not integrated into quality objectives.
-
Management reviews done late or missing discussion of trends.
How to avoid them
Keep one CAPA tracker covering both internal and external findings.
Ensure your management review includes quantitative indicators: number of CAPAs opened/closed, EQA performance, and client feedback trends.
Pro Tip:
Schedule the management review right after your annual internal audit cycle — timing it this way ensures your review uses the latest data.
5. Documentation and Record Control
Even though it spans all clauses, documentation errors remain a top cause of non-conformities.
Version control, document distribution, and uncontrolled copies often trip up otherwise strong labs.
Keep an updated Document Master List showing version, owner, and next review date.
It proves traceability and prevents outdated procedures from slipping into use.
Recognizing these patterns helps you shift from reactive to proactive.
When you address these issues in your internal audits, your accreditation audit becomes a confirmation — not a discovery exercise.
That’s how confident labs stay consistently compliant.
Managing Audit Findings and Corrective Actions Effectively
Every audit — even the most successful one — produces findings.
That’s not a failure; it’s feedback.
How your laboratory responds to those findings says more about your competence than the findings themselves.
ISO 15189:2022 expects you to manage non-conformities through a transparent, evidence-based corrective action process that demonstrates control, accountability, and learning.
1. Record Every Finding Clearly and Objectively
Start by describing each finding exactly as stated by the assessor — no editing, no rephrasing.
Include:
-
The clause reference
-
The issue observed
-
The objective evidence (document, record, or observation)
Example:
Clause 7.7.2 – Two sample logs lacked second-person verification.
Evidence: Reviewed sample reception book, entries 1358 and 1362.
This clarity helps your team focus on the real issue instead of debating interpretations.
Pro Tip:
Assign a unique CAPA number to each finding immediately.
It keeps traceability clear from audit report to resolution.
2. Contain the Problem First
Before jumping into analysis, take containment actions to minimize any risk.
This might mean retesting affected samples, isolating equipment, or retraining staff temporarily.
Containment proves you can act quickly to protect data integrity and patient safety while you investigate further.
3. Conduct Root-Cause Analysis
Don’t stop at “human error.”
Assessors want to see that you’ve looked beyond surface causes to identify system-level issues.
Use structured tools like:
-
5 Whys for simple process gaps
-
Fishbone (Ishikawa) diagram for complex, multi-factor problems
Example:
Issue: Missing QC entries.
Root cause: No defined ownership for daily QC sign-off after staff rotation.
Corrective action: Added QC verification to shift handover checklist.
A strong root-cause analysis shows maturity — it’s how you move from fixing symptoms to solving problems.
4. Develop and Implement the Corrective Action Plan
Each CAPA should include:
-
Action items (what will be done)
-
Responsible person (who will do it)
-
Timeline (when it will be completed)
-
Evidence required (how success will be shown)
Keep your plan realistic but measurable.
Vague phrases like “staff retraining” or “procedure updated” aren’t enough — define exactly what changed and how it will be verified.
Pro Tip:
Link your CAPA to the corresponding clause and audit type (internal or external).
That traceability helps demonstrate full closure during surveillance visits.
5. Verify the Effectiveness
Once actions are implemented, review whether the issue has been permanently resolved.
Verification methods can include:
-
Follow-up audits
-
QC trend reviews
-
EQA performance improvement
-
Staff competency reassessment
Example:
Follow-up internal audit confirmed all QC records complete for three consecutive months.
CAPA verified as effective — closed 10/08/2025.
Verification isn’t optional — it’s the evidence that your system learns.
6. Close and Document Transparently
Once verified, formally close the CAPA with sign-off from the Quality Manager or authorized person.
Keep all related documents (root-cause notes, actions taken, proof of verification) together.
During your next accreditation visit, you’ll need to show both the process and the proof.
Pro Tip:
Use one CAPA tracker for all findings — internal, external, and EQA.
It creates a single story of improvement and makes trend analysis effortless.
7. Review Trends and Lessons Learned
At least quarterly, review CAPA trends to identify recurring issues.
Patterns point to systemic weaknesses — and fixing them strengthens your lab’s overall resilience.
Discuss these trends during management review meetings to show a closed loop between audits, actions, and improvement.
When you handle audit findings with structure and transparency, you shift the tone of your next audit.
Assessors don’t see a lab hiding issues; they see a lab in control — confident, organized, and constantly improving.
That’s what passing an ISO 15189 audit really looks like.
Preparing for the External Accreditation Audit
This is the moment everything leads up to — when assessors from the accreditation body walk through your doors to verify that your laboratory truly meets ISO 15189:2022 requirements.
If your internal audits, documentation, and CAPAs are in order, this visit becomes less about inspection and more about confirmation.
The goal isn’t to impress assessors — it’s to prove, through calm confidence and organized evidence, that your quality system is effective and sustainable.
1. Know What to Expect During the Audit
Accreditation audits usually begin with an opening meeting, followed by document review, facility walkthroughs, interviews, and observation of testing activities.
Assessors will:
-
Evaluate your management system implementation.
-
Review technical competence — staff, equipment, methods, QC, and EQA.
-
Examine records for traceability and objective evidence.
-
Observe routine work and witness examinations.
They’ll be guided by your declared scope of accreditation, so be prepared to discuss every method and matrix you’ve included.
Pro Tip:
Prepare a short “Audit Overview Sheet” that lists your key contacts, organizational structure, and test scope.
It gives assessors quick orientation and sets a professional tone from the start.
2. Organize Your Audit Space
Designate a clean, quiet area as your audit base room.
Stock it with:
-
A laptop or binder containing all core documents (Quality Manual, SOP index, CAPA log, management review minutes).
-
A copy of your scope and latest PT/EQA results.
-
A sign-in sheet for staff joining interviews or demonstrations.
This setup sends a clear signal: your lab is organized, transparent, and ready for review.
Pro Tip:
Keep only controlled copies of documents in the audit room.
Assessors should never see conflicting versions — version control is one of the quickest credibility checks.
3. Brief Your Team
A confident, prepared team leaves a strong impression.
Hold a short orientation before the audit:
-
Explain the agenda and audit flow.
-
Review key policies (impartiality, confidentiality, quality objectives).
-
Remind staff to answer truthfully, briefly, and to reference documents when needed.
Encourage calm, not perfection — authenticity builds trust.
Example phrase for staff:
“Our procedure for this is in SOP-QA-06. Let me show you the record.”
That’s the kind of answer assessors appreciate.
4. Prepare Key Evidence in Advance
Assessors will request proof in several focus areas.
Prepare supporting evidence for each ahead of time:
-
Clause 5: Updated organization chart and management commitment records.
-
Clause 6: Training records, equipment calibration, maintenance logs.
-
Clause 7: QC, EQA results, method validation data, sample traceability.
-
Clause 8: Internal audits, CAPA tracker, risk assessments, and management review minutes.
Having these indexed or hyperlinked in advance reduces stress and keeps the audit flowing smoothly.
5. Conduct a Mock Assessment
Two weeks before the audit, perform a mock run simulating assessor behavior:
-
Have internal auditors request documents randomly.
-
Test your team’s response under time pressure.
-
Identify any missing or inconsistent records.
Pro Tip:
Use your mock results to adjust your “Audit Readiness Binder” — every weak spot you fix now saves you time during the real audit.
6. Manage Audit Logistics
Little details make a big difference:
-
Ensure assessors have visitor badges, Wi-Fi, and escorted access.
-
Confirm instrument availability for demonstration.
-
Inform staff of the audit schedule so testing flow continues smoothly.
A seamless environment reflects professionalism — and it helps assessors stay focused on what matters: your system’s competence.
When preparation is this deliberate, the external audit stops being stressful.
Instead, it becomes what it’s meant to be — a transparent, professional review of a quality system that’s already functioning effectively.
During the Audit: How to Communicate with Assessors
When the audit starts, all the preparation you’ve done — your documentation, your CAPAs, your team briefings — comes together.
This stage isn’t about memorizing answers or impressing assessors. It’s about communicating clearly, demonstrating control, and showing that your lab operates with consistency and confidence.
Auditors are trained to evaluate systems, not personalities.
If you stay calm, transparent, and factual, the process flows naturally — and you build credibility from the first interaction.
1. Start Strong: The Opening Meeting
The opening meeting sets the tone for the entire audit.
Typically led by the lead assessor, it’s where they review the scope, objectives, and agenda.
Your role:
-
Introduce key staff and clarify responsibilities.
-
Confirm logistics (safety, access, contacts).
-
Provide a quick overview of your quality system and structure.
Keep it short — under 10 minutes. This isn’t a presentation; it’s a professional handshake that tells assessors, “We’re ready and organized.”
2. Communicate with Clarity and Evidence
When assessors ask questions, your best response follows this simple flow:
-
Acknowledge the question.
-
Refer to the relevant procedure or document.
-
Show objective evidence.
Example:
“Our sample rejection criteria are in SOP-QA-05, section 4. Here’s the latest record showing how we documented a rejected specimen last week.”
That response does three things assessors love: it’s concise, factual, and traceable.
Pro Tip:
Never guess. If you’re unsure, say, “Let me confirm and get the record for you.”
That’s professionalism, not weakness.
3. Keep Answers Brief and Relevant
Assessors prefer short, clear answers that directly address their question.
Avoid overexplaining or defending a process — let your records and procedures speak for themselves.
Common mistake:
Explaining why something is done instead of showing how it’s done.
Your goal is to demonstrate compliance through evidence, not persuasion.
4. Manage Team Involvement Strategically
Assign one audit liaison per section — usually the supervisor or senior technologist.
They should know where documents are stored, how to access digital records, and who else can provide clarifications.
Only the designated person should speak during that section of the audit — it prevents confusion and ensures accuracy.
If multiple staff are present, agree beforehand who handles which type of question.
Pro Tip:
Have your Quality Manager or coordinator track document requests in real time.
It helps manage flow and ensures nothing gets misplaced or delayed.
5. Stay Professional Under Pressure
Sometimes, assessors challenge your process or interpretation of the standard.
Stay calm and factual.
If you disagree with a comment, note it respectfully and say:
“Thank you for the observation — we’ll review it against our documented process and respond in our post-audit report.”
You’ve acknowledged the point without argument, maintaining control and professionalism.
6. Maintain Transparency Throughout
Be open about what you have — and what you’re still improving.
Assessors value honesty far more than defensiveness.
If they discover a small issue, acknowledge it, explain your planned action, and show your system for tracking improvements.
That response demonstrates a learning culture — one of ISO 15189’s core principles.
7. Use the Closing Meeting Wisely
At the end of the audit, the assessors will summarize their findings.
Listen carefully, take notes, and ask for clarification if any point seems unclear.
Do not debate findings during this session — focus on understanding them.
Confirm:
-
Classification of findings (major, minor, observation).
-
The timeline for submitting your corrective-action plan.
-
The contact process for any follow-up questions.
End the meeting with appreciation and professionalism — it leaves a strong final impression.
When communication during the audit is clear, honest, and structured, assessors see a lab that’s in full command of its system.
That’s the kind of confidence no document can fake — it’s built on preparation, consistency, and respect for the process.
After the Audit: From Findings to Continuous Improvement
Once the assessors leave, the real value of your ISO 15189:2022 audit begins.
This phase is where you turn audit results into tangible improvements — transforming findings into evidence that your system works, adapts, and learns.
Passing the audit isn’t just about closing findings; it’s about building a continuous improvement cycle that keeps your lab accreditation-ready all year long.
1. Review the Audit Report Thoroughly
When you receive the audit report, review every finding line by line.
Confirm:
-
The clause referenced
-
The description of the finding
-
The classification (major, minor, observation)
-
The evidence cited
Make sure you understand exactly what each point means before you start responding.
If anything is unclear, contact the accreditation body immediately for clarification — it’s better to ask early than to guess.
Pro Tip:
Summarize findings in a simple internal table listing: clause, issue, owner, due date, and status.
It becomes your “post-audit dashboard” and keeps the process visible to everyone.
2. Prioritize and Assign Corrective Actions
Treat every finding as a project.
Assign clear ownership and timelines for each CAPA, and use your standard format for root-cause analysis, corrective actions, and verification steps.
Typical timeframes expected by accreditation bodies:
-
Submission of corrective-action plan: within 30 days
-
Evidence of implementation: within 60 to 90 days
Stay ahead of these deadlines — proactive follow-up demonstrates control.
3. Address Root Causes, Not Symptoms
Take the time to investigate properly.
If an assessor found missing calibration certificates, don’t just reprint them — find why they were missing in the first place.
Was it a scheduling gap? A staff responsibility issue? A missing reminder system?
Document that reasoning.
It shows your corrective actions are sustainable, not superficial.
Pro Tip:
Revisit your risk register after closing major CAPAs.
If the issue exposed a risk you hadn’t listed, update the register to prove your risk-based thinking in line with ISO 15189:2022.
4. Communicate Results Across the Team
Hold a short debrief session once the report is received.
Share findings transparently with department heads and staff.
When everyone understands what went wrong — and how it’s being fixed — you prevent repeat issues and build ownership.
Encourage openness: findings aren’t failures; they’re feedback for growth.
5. Verify Effectiveness Before Closure
For each CAPA, include a follow-up step — usually a mini internal audit or data review — to confirm the issue has not reoccurred.
Attach objective evidence like updated SOPs, revised logs, or improved QC trends.
Only close CAPAs when you’ve verified results over time, not just on paper.
6. Incorporate Lessons into Management Review
Feed audit outcomes directly into your next management review.
Include:
-
Number of findings by category
-
Time to closure
-
Recurrence rates
-
Improvements achieved
This demonstrates that your laboratory doesn’t just fix issues — it learns from them, turning audits into ongoing performance metrics.
Pro Tip:
Highlight resolved findings and resulting improvements (e.g., “Reduced instrument downtime after implementing automated maintenance alerts”).
Assessors often note this as evidence of continual improvement.
7. Prepare for Surveillance or Reassessment Audits
Your next audit — whether surveillance or full reassessment — will always revisit previous findings.
Keep your CAPA evidence accessible and organized.
When assessors see issues permanently resolved, it strengthens your reputation as a well-managed, self-correcting system.
An audit’s value isn’t in its findings — it’s in your follow-through.
Every closed nonconformity, every improvement logged, adds another layer of confidence to your laboratory’s operations.
That’s how you turn an accreditation audit from a stressful event into a structured cycle of growth and assurance.
Real-Life Example – How One Laboratory Turned an Audit Around
A few years ago, a mid-sized diagnostic laboratory was preparing for its first ISO 15189 accreditation.
Their technical processes were solid — but during their pre-assessment, the assessors identified ten non-conformities, mostly related to documentation control, training records, and incomplete CAPA follow-ups.
For many labs, that would have felt like a setback.
But instead of panicking, this team used the findings as a roadmap.
1. Turning Findings into a Plan
The Quality Manager gathered all department heads the same day they received the report.
Each non-conformity was logged into a shared CAPA tracker with clear owners and deadlines.
They didn’t just “fix paperwork.”
They restructured their document-control system, retrained staff on revision management, and automated reminders for competence re-evaluations.
2. Tackling Root Causes, Not Symptoms
Rather than treating missing records as isolated mistakes, they traced the root causes — weak handovers, no version control, and unclear ownership of forms.
Every issue pointed to one central problem: fragmented communication.
Their solution was simple but powerful — a weekly 15-minute “QMS Huddle” where section heads reviewed any new documents, pending CAPAs, or upcoming audits.
Within two months, they had reduced their open CAPAs from ten to two — and those remaining were under active verification.
3. The Re-Assessment Outcome
By the time the reassessment audit arrived, the lab presented not only completed CAPAs but also measurable improvements:
-
Document retrieval time reduced from 20 minutes to under 5.
-
100% staff re-training completion.
-
Updated CAPA tracker showing verified effectiveness for all previous findings.
The assessors noted “significant improvement in system maturity” and granted accreditation without additional conditions.
4. The Key Lesson
Passing an ISO 15189 audit isn’t about perfection — it’s about control and transparency.
This lab proved that every non-conformity can become an opportunity to strengthen the system.
Their story is a reminder that preparedness, honesty, and follow-through speak louder than a perfect report.
FAQs – ISO 15189:2022 Audit Readiness
Even with strong systems in place, most labs preparing for their first ISO 15189:2022 accreditation share the same questions.
Below are the most common ones — answered based on what assessors actually expect and how accredited laboratories handle them in practice.
Q1. How long does ISO 15189 accreditation take from preparation to certification?
It depends on your laboratory’s starting point and the readiness of your documentation.
For a lab with an established QMS, the average timeline is 6–9 months from the initial gap analysis to the final accreditation visit.
Labs building their system from scratch may need up to a year.
Pro Tip:
Plan your internal audits and management review at least three months before applying for the accreditation audit.
That gives you enough time to correct issues before formal assessment.
Q2. What documents do assessors usually request first?
While it varies slightly by accreditation body, most start with the same core set:
-
Quality Manual and Quality Policy
-
Scope of accreditation
-
Organizational chart and job descriptions
-
Document control procedure
-
Internal audit report and CAPA log
-
Latest management review minutes
-
Proficiency testing and EQA results
Having these indexed and ready for quick access makes a strong first impression.
Q3. How soon should corrective actions be completed after an audit?
Typically:
-
30 days to submit your corrective-action plan
-
60 to 90 days to provide evidence of implementation and effectiveness
Always communicate early if you need an extension — assessors appreciate transparency more than rushed, incomplete evidence.
Q4. What’s the difference between a surveillance visit and a full reassessment?
A surveillance visit is a shorter, follow-up audit (usually annual) that reviews selected areas, verifies previous findings, and checks continued compliance.
A reassessment is a full, clause-by-clause review that occurs every few years.
Treat both with the same discipline — any repeat finding can escalate from minor to major.
Q5. How can we reduce stress during the actual audit?
-
Conduct a mock assessment one to two weeks before.
-
Keep one coordinator tracking document requests in real time.
-
Encourage staff to focus on evidence, not memorized answers.
-
Maintain a calm, factual tone — honesty always builds trust.
A confident, well-prepared team signals to assessors that your system works even under pressure.
When your questions shift from “What will the auditors ask?” to “How do we show control?”, you’ve already crossed the line from compliance to competence.
That’s what true audit readiness looks like.
Pass Your ISO 15189:2022 Audit with Confidence
Passing your ISO 15189:2022 accreditation audit the first time isn’t about luck or perfect paperwork — it’s about building a system that consistently works, day after day, even when no one’s watching.
A well-prepared laboratory doesn’t panic when assessors arrive; it simply shows the evidence of what it already does well.
When you follow a structured audit approach — planning early, conducting honest internal audits, addressing findings properly, and verifying improvements — your lab doesn’t just pass; it performs confidently under review.
That confidence is what assessors remember most.
Key Takeaways
-
Internal audits are your strongest preparation tool.
-
Document control and competence records are the foundation of a smooth assessment.
-
Every finding, whether internal or external, is a chance to improve your system.
-
Communication and transparency during the audit build lasting trust with assessors.
-
Continual improvement — not perfection — is what defines a mature ISO 15189 laboratory.
Final Thought
An audit-ready laboratory isn’t built by reacting to assessments — it’s built by integrating quality into everyday work.
When your procedures, staff, and records align naturally, the audit becomes just another part of business as usual.
That’s the ultimate goal of ISO 15189: a quality system that proves itself, every single day.
Next Step
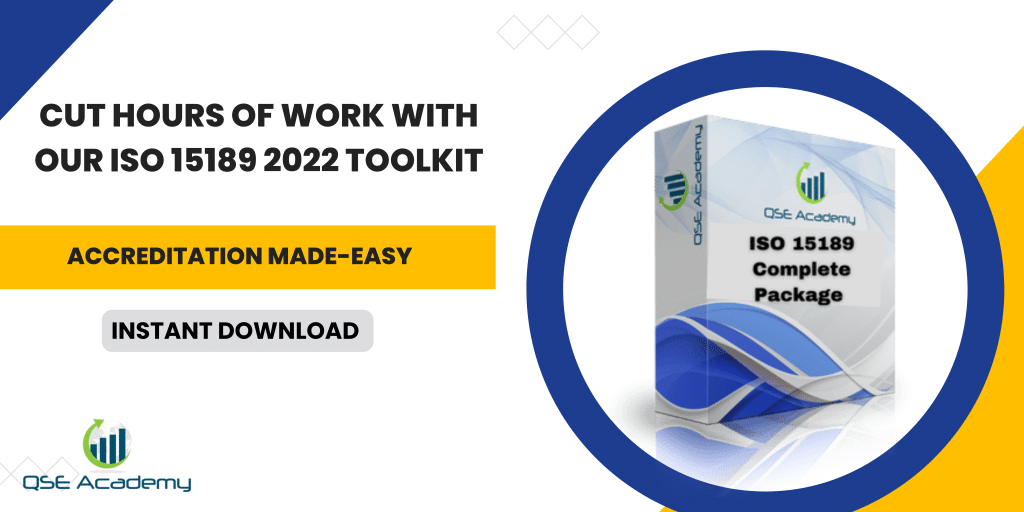
If you want to streamline your preparation and keep your entire audit process organized, start with tools designed specifically for medical laboratories.
[Download QSE Academy’s ISO 15189 Audit Toolkit] — complete with internal audit checklist, CAPA tracker, and readiness planner.
It’s built to help you document, track, and verify every step of your audit journey — so your lab can pass with confidence the first time.
Whether it’s ISO 9001, ISO 22000, or the cosmetics-focused ISO 22716, I’ve spent my career I’m not here to call myself an expert—I prefer “enthusiast” because I truly love what I do. When I’m not writing about standards, you’ll probably find me playing Piano 🎹, connecting with people, or diving into my next big project💫. I’m an engineer specialized in the food and agricultural industry
make ISO standards less intimidating and more approachable for everyone.
turning complex jargon into clear, actionable steps that businesses can actually use.
There’s something incredibly rewarding about helping people navigate food safety and quality management systems
in a way that feels simple, practical, and even enjoyable.
I have a Master’s in QHSE management and over 12 years of experience as a Quality Manager
I’ve helped more than 15 companies implement ISO 9001, ISO 22000, ISO 22716, GMP, and other standards
My clients include food producers, cosmetics manufacturers, laboratories, and service companies
I believe quality systems should be simple, useful, and efficient.
Related Posts