ISO 15189:2022 Accreditation Timeline in 6 Steps
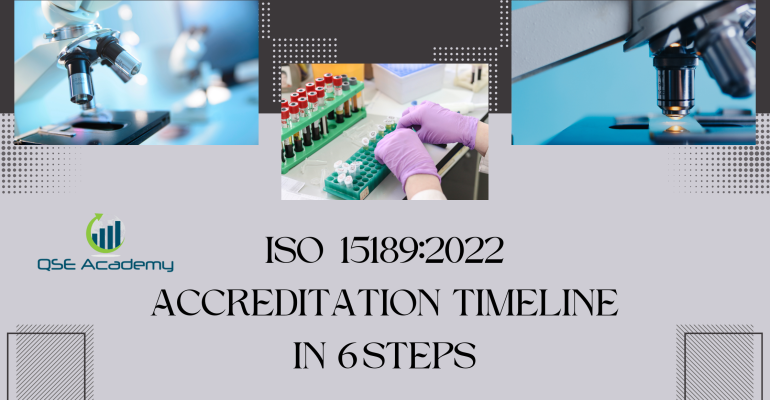
ISO 15189:2022 Accreditation Timeline in 6 Steps
Last Updated on October 22, 2025 by Hafsa J.
How Long Does ISO 15189 Accreditation Really Take?
Every lab wants to know the same thing when they start the ISO 15189 journey: “How long will this take?”
I’ve helped enough medical and diagnostic labs over the years to know there’s no single answer — but there is a clear pattern. Most labs underestimate how long accreditation takes because they don’t break the process into stages. They focus on documentation and forget that audits, corrective actions, and assessor scheduling all take time too.
The truth is, ISO 15189:2022 accreditation isn’t just about meeting requirements — it’s about pacing your implementation so you don’t burn out your team or blow your budget.
In this guide, I’ll walk you through a 6-step timeline that shows what actually happens from your first planning meeting to the day you get your certificate. You’ll see realistic timeframes, common roadblocks, and ways to keep your lab on track every step of the way.
Let’s start with where it all begins — management commitment.
Step 1: Initial Decision & Management Commitment
Every successful ISO 15189 project starts with one thing — a clear decision from management. Without it, the process stalls before it even begins.
At this stage, your lab’s leadership needs to do more than just say “yes.” They have to commit time, people, and budget. That means assigning a Quality Manager, setting up an implementation team, and making accreditation a measurable goal in your yearly plan.
Here’s what usually happens in this phase:
-
Internal discussions about why accreditation matters — patient trust, regulatory compliance, or competitive advantage.
-
Budget allocation for documentation, training, and the assessment itself.
-
Assigning responsibilities — who will write procedures, manage records, and handle internal audits.
Pro Tip: Set a target date for accreditation right from the start. It doesn’t have to be exact, but it creates accountability and helps everyone pace the work.
Common pitfall: Rushing into the application before management fully understands the commitment. Labs that do this often face burnout halfway through implementation.
Once leadership is on board and a core team is in place, it’s time to find out where your lab stands — and that’s where the gap analysis comes in.
Step 2: Gap Analysis & Project Planning
This is where your ISO 15189 journey truly begins. A gap analysis is like a health check for your laboratory management system — it shows exactly where you stand compared to the 2022 requirements.
Here’s how it works: you go clause by clause through ISO 15189:2022, comparing what you already have in place against what’s missing or needs improvement. Most labs take 2–4 weeks to complete this, depending on their size and documentation maturity.
The outcome? A clear action plan. You’ll know which procedures need rewriting, which records don’t exist yet, and where staff training is required.
Pro Tip: Treat your gap analysis as the foundation of your project plan. Document everything. When the assessors come later, this file becomes your evidence that you identified and addressed risks systematically.
Example: One diagnostics lab I worked with divided the standard into eight sections and assigned each to a department lead. In three weeks, they completed their entire gap analysis — and more importantly, every team felt ownership of their part.
Once you’ve identified the gaps, the next step is filling them — through structured documentation and process alignment. Let’s dive into that next.
Step 3: Implementation & Documentation Development
This is where most of the heavy lifting happens. Once you know your gaps, it’s time to build or refine your quality management system — and that starts with documentation.
You’ll be developing or updating key documents like your Quality Manual, Standard Operating Procedures (SOPs), equipment records, and validation reports. It’s also the stage where you train staff, calibrate instruments, and start maintaining evidence that shows compliance in action.
For most labs, this stage takes 3 to 6 months. It depends on how many departments you have and whether your current systems already follow ISO principles.
Pro Tip: Roll out documentation one department at a time. It’s far more effective than trying to change everything at once. Each section can review, adapt, and train at its own pace — and you’ll get higher engagement from your staff.
Common pitfall: Copy-pasting generic templates without customizing them. Assessors spot that instantly. Templates should be a starting point, not a shortcut.
In my experience, the most successful labs treat this stage as a transformation, not a paperwork project. They use it to tighten workflows, improve consistency, and build real confidence in their results.
Once your documentation is in place and your processes are stable, you’re ready to test your system through an internal audit and management review — your first real rehearsal before the accreditation body steps in.
Step 4: Internal Audit & Management Review
Think of this stage as your “mock accreditation.” It’s where you test how well your quality system actually performs under pressure.
Your internal audit should cover every clause of ISO 15189:2022 — from document control and personnel competence to equipment calibration and test result reporting. The goal isn’t just to check boxes; it’s to see whether your system works in real life.
Here’s how most labs handle it:
-
Conduct internal audits across all departments.
-
Record findings, categorize nonconformities, and assign corrective actions.
-
Hold a management review meeting to discuss results, resource needs, and improvement plans.
This stage typically takes 4–6 weeks. It’s not the fastest phase, but it’s the most valuable one for preventing surprises later.
Pro Tip: Schedule short, focused audits weekly instead of one massive review at the end. It keeps the workload manageable and helps you fix issues early.
Real-world insight: A mid-sized lab I worked with divided their internal audit into six weekly sessions — one per major process. They completed it on time, stayed stress-free, and entered their external audit with confidence.
Once your internal audit is complete and management has reviewed the findings, you’re ready to engage with your accreditation body. That’s where pre-assessment comes into play.
Step 5: Application & Pre-Assessment
Now comes the formal part — reaching out to your chosen accreditation body (AB) and submitting your application. This stage marks the start of official communication and preparation for your external assessment.
Here’s what typically happens:
-
Application submission: You provide details about your lab’s scope, testing areas, staff, and locations.
-
Document review: The accreditation body reviews your Quality Manual, SOPs, and validation records to ensure readiness.
-
Pre-assessment (optional but valuable): Assessors conduct a short visit — or remote review — to identify gaps before the full audit.
This stage usually takes 6 to 8 weeks, though it can vary depending on assessor availability and how quickly you respond to feedback.
Pro Tip: Treat pre-assessment findings like gold. Every observation they make is a chance to fine-tune your system before the real audit. Address every comment thoroughly — it’ll save you time (and stress) later.
Common pitfall: Delaying responses to assessor questions or documentation requests. Every week you wait pushes your audit date further out.
Once you’ve passed the pre-assessment and resolved any issues, you’re officially on the path to the on-site assessment — the final step before accreditation.
Step 6: On-Site Assessment & Accreditation Decision
This is the big one — the official on-site assessment where your lab’s entire system is put to the test. Assessors visit your facility, interview staff, review records, and observe your technical processes in action.
For most labs, the on-site visit lasts 3 to 10 days, depending on your scope and size. Afterward, the assessors compile their findings and issue a detailed report listing any nonconformities that need to be corrected before accreditation can be granted.
Here’s how this stage typically unfolds:
-
Opening meeting: The assessors outline what they’ll review.
-
Process assessment: They evaluate everything from sample handling and testing to result reporting.
-
Closing meeting: You receive the preliminary findings and discuss timelines for corrective actions.
-
Corrective-action submission: You provide evidence showing how each issue was addressed — usually within 2 to 4 weeks.
-
Accreditation decision: The AB reviews your responses and, once satisfied, issues your accreditation certificate.
Pro Tip: Keep your corrective-action evidence organized in one folder (digital or physical). The faster and cleaner your response, the quicker your approval.
Common pitfall: Waiting too long to submit corrective actions. This is one of the top reasons final accreditation gets delayed — not assessor performance, but applicant response time.
Once your certificate is issued, your lab officially joins the accredited community. But remember — accreditation isn’t the end. Surveillance audits every 12 to 18 months will keep you sharp and compliant.
Now that we’ve covered the entire journey, let’s look at how the full timeline plays out in real numbers.
Example Timeline Overview
Every lab’s journey looks a little different, but the pattern is remarkably consistent once you break it down. Here’s what a typical ISO 15189:2022 accreditation timeline looks like when managed efficiently:
| Phase | Main Activities | Estimated Duration |
|---|---|---|
| Step 1: Decision & Planning | Leadership commitment, budgeting, team setup | 2–3 weeks |
| Step 2: Gap Analysis | Clause review, project planning, readiness check | 2–4 weeks |
| Step 3: Implementation | Documentation, staff training, validation, calibration | 3–6 months |
| Step 4: Internal Audit | Auditing, corrective actions, management review | 1–1.5 months |
| Step 5: Pre-Assessment | Application, document review, feedback resolution | 1–2 months |
| Step 6: Final Assessment | On-site audit, corrective actions, accreditation decision | 1–2 months |
| Total Timeline | — | 7–12 months (average) |
Of course, smaller single-discipline labs can sometimes finish in as little as 6 months, while complex multi-site operations might need a full year or slightly more.
Pro Tip: Build buffer time into every phase. Even one delayed document approval or a postponed assessor visit can push your timeline by several weeks. Labs that plan 10 months instead of 8 rarely miss their target — and they stay less stressed along the way.
Now that you’ve seen the timeline mapped out, let’s clear up a few common questions labs usually ask about how long accreditation really takes.
FAQs – ISO 15189 Accreditation Timeline
1. Can ISO 15189 accreditation really be completed in less than a year?
Yes, but only if your lab is well-prepared. Smaller, single-discipline labs with strong documentation systems can complete the process in 6–8 months. The key is readiness — having records, validations, and procedures aligned before applying.
2. What usually causes delays?
The biggest time-killers are incomplete documentation, slow corrective-action responses, and assessor scheduling bottlenecks. I’ve seen labs lose two months simply because their team didn’t reply to assessor comments on time.
3. How long does re-accreditation take compared to the first cycle?
Renewal or surveillance audits are generally faster — around 4–6 months — since your system is already established. As long as you’ve maintained consistent records, the reassessment will focus more on verification than rebuilding.
4. Can labs overlap steps to speed things up?
Absolutely. Some labs run training, documentation updates, and internal audits in parallel to save time. Just make sure overlapping doesn’t create confusion or duplicated work — structure is what keeps the process efficient.
Now, let’s wrap everything up with one final look at what truly controls your timeline — and how to stay ahead of it.
Plan the Timeline, Control the Outcome
ISO 15189:2022 accreditation isn’t a quick sprint — it’s a structured, strategic project. The labs that succeed don’t rush; they plan. By breaking the journey into six clear stages, you can predict your milestones, control your pace, and avoid the stress that comes from last-minute scrambling.
Here’s what I’ve seen work time and again: labs that plan early, document consistently, and keep communication open with their accreditation body always move faster — not because they skip steps, but because they avoid rework.
The real takeaway? A clear timeline is your biggest advantage. It helps you budget accurately, manage staff expectations, and keep everyone accountable from day one to certification day.
If you’d like to make the process easier, you can use our ISO 15189 Accreditation Timeline Planner — a ready-to-use template that breaks each step into tasks and time estimates.
Because when you manage your timeline, you don’t just get accredited faster — you get accredited smarter.
Whether it’s ISO 9001, ISO 22000, or the cosmetics-focused ISO 22716, I’ve spent my career I’m not here to call myself an expert—I prefer “enthusiast” because I truly love what I do. When I’m not writing about standards, you’ll probably find me playing Piano 🎹, connecting with people, or diving into my next big project💫. I’m an engineer specialized in the food and agricultural industry
make ISO standards less intimidating and more approachable for everyone.
turning complex jargon into clear, actionable steps that businesses can actually use.
There’s something incredibly rewarding about helping people navigate food safety and quality management systems
in a way that feels simple, practical, and even enjoyable.
I have a Master’s in QHSE management and over 12 years of experience as a Quality Manager
I’ve helped more than 15 companies implement ISO 9001, ISO 22000, ISO 22716, GMP, and other standards
My clients include food producers, cosmetics manufacturers, laboratories, and service companies
I believe quality systems should be simple, useful, and efficient.
Related Posts