Here’s what I’ve noticed after working with dozens of medical laboratories chasing ISO 15189 accreditation: most of them aren’t failing because their testing is poor — they’re failing because their audit preparation is.
When the accreditation body announces an audit, chaos often follows. Documents get updated overnight, staff get nervous, and managers scramble to find missing calibration records. Sound familiar?
The truth is, ISO 15189 accreditation isn’t won on audit day — it’s won in the 90 days before it. That’s when your lab’s systems, records, and people either fall into place or fall apart.
This guide walks you through the same audit-readiness system we use when preparing client labs worldwide. By the end, you’ll know how to:
Plan your audit timeline without burnout.
Get your documents and evidence under control.
Train your staff to answer confidently and naturally.
Handle findings calmly — even if they’re unexpected.
We’ll break it down step-by-step, using real examples and field-tested pro tips. Because once you prepare smart, ISO 15189 audits stop being stressful events — and start becoming proof of how solid your quality system really is.
Understanding the ISO 15189:2022 Accreditation Audit Process
If you’ve never gone through an ISO 15189 accreditation audit before, it can feel a bit like walking into a test you didn’t write the questions for. But once you understand how the process works — and what assessors are actually looking for — the anxiety fades fast.
Let’s break it down.
Stage 1: Document Review
This is your first checkpoint. Assessors will review your documented management system — things like your quality manual, procedures, training records, and equipment logs — to confirm they align with ISO 15189:2022 requirements.
At this stage, they’re not judging performance yet. They’re checking whether your system exists and if it looks coherent on paper. Inconsistencies, missing SOPs, or unclear responsibilities are red flags here.
Pro Tip: Before Stage 1, run a quick “document consistency check.” Ask yourself: does every procedure mentioned in my quality manual actually exist — and does it match what we do in practice?
Stage 2: On-Site Assessment
Once your documents are accepted, assessors will visit your laboratory. This is where they observe your team in action — watching how samples are received, how tests are performed, and how results are verified. They’ll interview staff, review records, and evaluate whether your daily operations match your documented procedures.
What assessors are really looking for:
Evidence of consistency between documentation and practice
Staff competence and awareness of quality procedures
Proper record control and traceability
Objective proof of calibration, maintenance, and QC performance
Common Mistake: Labs often prepare only their documents and forget the human side. An assessor can tell in seconds if staff were “briefed” instead of trained. Confidence and authenticity always win over memorized answers.
Beyond Stage 2: Surveillance and Reassessment
Once accredited, you’re not off the hook. Most accreditation bodies conduct annual surveillance audits and full reassessments every 4–5 years. These ensure you’re maintaining — not just achieving — compliance.
Pro Tip: Treat every internal audit like a rehearsal for your next external one. The more consistent your internal reviews, the fewer surprises you’ll face later.
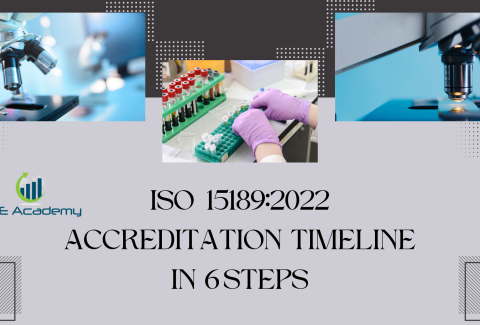
Step-by-Step Audit Preparation Timeline (60–90 Days Before Audit)
Here’s what I’ve learned after preparing laboratories for accreditation around the world — the labs that pass smoothly don’t just “work hard,” they work in sequence. Audit preparation is all about timing. You can’t fix everything at once, but if you pace your actions over 90 days, everything falls into place naturally.
Let’s walk through that timeline together.
90 Days Before the Audit – Assess Your Gaps
Start by taking a step back. Conduct a full gap analysis against ISO 15189:2022 clauses (4 to 8). This helps you spot missing procedures, outdated records, or unclear responsibilities before the assessors do.
Ask yourself:
Do all required SOPs exist and reflect actual practice?
Are staff job descriptions and competency records updated?
Are risk assessments and management reviews complete?
Pro Tip: Use a simple color-coding system (Green = Compliant, Yellow = Needs Update, Red = Missing). This visual approach keeps everyone aligned and motivated.
60 Days Before the Audit – Run Your Internal Audit
By now, your documentation should be mostly in order. Next, it’s time to test your system through an internal audit. Simulate the real thing — interview staff, inspect facilities, and verify calibration, maintenance, and QC records.
Common Mistake: Treating the internal audit like paperwork. It’s your best chance to discover what assessors might find. The more honest your internal audit, the fewer surprises later.
30 Days Before the Audit – Tighten Documentation
Now it’s time to fine-tune your paperwork. Ensure every document, form, and record is:
Approved and controlled
Signed and versioned correctly
Accessible to staff during the audit
Pro Tip: Create an Audit Folder — a single, easy-to-access directory (digital or physical) containing:
Quality manual
Internal audit reports
CAPA logs
Training records
Calibration and maintenance certificates
You’ll thank yourself when the assessor asks for a document, and you can retrieve it in seconds.
15 Days Before the Audit – Prepare Your People
Even the most organized QMS can stumble if staff freeze during interviews. Run short refresher sessions. Have department heads explain how their processes tie into quality objectives.
Ask practice questions like:
“What’s your role in maintaining result accuracy?”
“How do you report nonconformities?”
Common Mistake: Over-rehearsing staff with scripted answers. Assessors value authentic understanding, not memorization.
Audit Week – Final Readiness Check
Do a final walk-through of your facility. Check cleanliness, calibration stickers, reagent labeling, and safety signage. Print updated org charts and emergency contacts for display.
Pro Tip: Hold a 10-minute “confidence huddle” the day before. Remind everyone: the audit is about showing what you already do right — not about catching mistakes.
When you follow this sequence, audit preparation feels calm and controlled. Each phase builds on the previous one, so by the time assessors walk in, you’re not hoping you’re ready — you know you are.
Documentation and Record Control – Your Foundation for Compliance
If there’s one thing ISO 15189 assessors never overlook, it’s documentation. Your lab can have excellent staff and top-tier equipment, but if your records are messy or outdated, your audit will feel like a storm.
Documentation isn’t just paperwork—it’s your proof of control. It shows that you plan, perform, and record every activity consistently. In short: if it isn’t documented, it didn’t happen.
Organize Before You Optimize
Start by reviewing your document control system. Every lab should have a clear method for:
Creating and approving new documents
Managing revisions and version control
Removing obsolete copies from use
Ensuring everyone has access to the latest versions
If your team still uses printed SOPs, make sure only the controlled versions are in circulation. I’ve seen assessors point out old versions taped to lab walls—it’s a quick way to lose confidence.
Pro Tip: Label every SOP footer with its version number, issue date, and approver. It’s a small detail, but it signals strong control immediately.
Set Up a Centralized Record System
Instead of scattering audit evidence across multiple folders, create one master index for all controlled records:
Quality manual
SOPs and work instructions
Equipment calibration and maintenance logs
Training and competency records
Internal audit reports
CAPA and risk assessment logs
Management review minutes
You can do this digitally or in a binder—what matters is accessibility. Assessors will test your system by asking, “Can you show me the calibration certificate for this analyzer?” Your response speed says a lot about your readiness.
Common Pitfalls to Avoid
Duplicate Documents – Two versions of the same SOP create confusion. Archive old versions properly and mark them “OBSOLETE.”
Missing Signatures – A document isn’t valid until it’s approved. Every controlled document should have at least one authorized signature.
Unlinked Records – If your CAPA refers to “Audit Finding #4,” make sure that finding is easy to locate. Broken traceability is a common minor nonconformity.
Pro Tip: Build an “Audit Folder”
This one’s simple but powerful. Gather all key documents and records into one folder labeled “Audit 2025 Readiness.” Include your quality manual, latest internal audit, calibration certificates, and CAPA summary. When the assessor asks for evidence, you’ll look organized and confident.
In the eyes of an assessor, your documentation tells your story. A clean, consistent, and well-controlled system says your lab is serious about quality. And that’s the kind of first impression you want to make.
Preparing Personnel and Conducting Mock Interviews
Here’s something most labs overlook until it’s too late — your people make or break your audit. Assessors can tell within minutes if your staff actually understand the system or if they were “briefed” the night before. That’s why staff preparation deserves as much focus as your documentation.
Train for Confidence, Not Perfection
Your team doesn’t need to memorize ISO clauses — they just need to understand how their work fits into the bigger system. Every technician, supervisor, and admin should be able to explain what they do and why it matters to quality and patient safety.
Here’s how to prepare them:
Hold short QMS refresher sessions by department.
Explain the intent behind procedures, not just the steps.
Encourage staff to speak naturally — not like they’re reciting a script.
Pro Tip: Ask everyone to describe their process in their own words. For example:
“When I receive a sample, I check the label, record it in the LIS, and verify storage conditions before testing.” That’s real understanding — and it’s exactly what assessors want to hear.
Conduct Mock Interviews
Simulate an audit scenario. Have one team member play the assessor and another act as the auditee. Ask realistic, open-ended questions such as:
“Show me where you record temperature logs.”
“What happens if you notice an out-of-range result?”
“How do you handle expired reagents?”
Rotate roles so everyone experiences both perspectives. You’ll be surprised how much this simple exercise boosts confidence.
Common Mistake: Over-coaching. When staff memorize answers word-for-word, they sound robotic and insincere. Assessors don’t want rehearsed perfection—they want authenticity backed by evidence.
Evaluate Awareness, Not Just Answers
During mock sessions, assess general awareness:
Do staff know where the quality manual is kept?
Can they find an SOP when asked?
Do they understand how to report nonconformities?
If someone hesitates, that’s a cue for targeted refresher training — not criticism.
Pro Tip: Pair less experienced staff with mentors who’ve already been through an audit. They’ll learn faster through real conversations than through PowerPoint slides.
Keep the Energy Positive
Audits can make people nervous. Remind your team that the assessor isn’t there to catch mistakes — they’re there to verify competence. A calm, confident tone always leaves a strong impression.
One lab I worked with used to start audit day with a two-minute “team huddle.” The manager would say: “We’re not here to perform — we’re here to show what we do every day.” It completely changed the room’s energy.
The takeaway? Your documents might earn compliance, but your people earn credibility. Train them to speak with clarity, act with confidence, and own their part in the system — that’s what turns a good audit into a great one.
Facility and Equipment Readiness
Here’s what I’ve noticed during countless ISO 15189 audits — even the best-prepared labs can lose points over simple physical and equipment issues. Not because they don’t know the standard, but because they underestimate the visual impact of their facility and the traceability of their instruments.
Assessors don’t just review documents — they walk your space. They’ll look at your benches, labels, calibration stickers, and how clean and organized your lab feels. So let’s make sure every corner of your lab tells the story of control and competence.
Start with a Walk-Through
A few weeks before the audit, do a full walk-through as if you were the assessor. Bring your internal auditor or someone unfamiliar with daily operations. You want “fresh eyes” to spot what your team might overlook.
Check for:
Proper labeling on all reagents and sample containers
Valid calibration stickers on instruments
Clean, well-ventilated, and clutter-free workspaces
Clearly marked safety zones and fire extinguishers
Current versions of SOPs near workstations
Pro Tip: Use a “walk-through checklist” and mark any issues immediately. You’d be surprised how often a missing sticker or outdated SOP becomes an unnecessary nonconformity.
Check Equipment Calibration and Maintenance
Assessors love to trace evidence. They might pick one analyzer and say, “Show me its calibration certificate and maintenance record.” If you can pull it up instantly, it builds trust fast.
Here’s what to double-check:
Calibration and preventive maintenance logs are up to date
Certificates are traceable to national or international standards
Maintenance activities are signed and dated
Instruments taken out of service are clearly tagged and isolated
Common Mistake: Performing maintenance but forgetting to record it. Remember — no record, no proof.
Verify Environmental Controls
Temperature, humidity, and cleanliness matter just as much as calibration. Make sure monitoring devices are working, and logs are complete. If you use digital systems, confirm alarms are functional and calibration dates are valid.
Pro Tip: Display temperature charts or digital readouts where assessors can see them easily. It signals control without you having to say a word.
Labeling and Storage – The Small Things That Speak Loudly
Expired reagents, faded labels, or unlabeled sample racks are small details that send big messages. Do a shelf-by-shelf check:
Discard anything expired or unlabeled.
Use consistent label formats (sample ID, date, initials).
Ensure chemical and biohazard waste containers are clearly marked.
Example: One client avoided a major finding simply by color-coding reagent labels by month. It made expiry checks visual and foolproof.
Don’t Forget Housekeeping
A tidy lab builds immediate credibility. Organized benches, labeled storage areas, and a clean environment show discipline. Even something as simple as aligning reagent bottles or wiping down instruments can subtly influence assessor confidence.
Pro Tip: Do a “clean sweep” two days before the audit — everyone spends 10 minutes decluttering their area. It’s simple, fast, and incredibly effective.
Your facility is the first impression your assessor gets, and first impressions stick. When your lab looks controlled, your systems feel controlled. That visual discipline often sets the tone for the entire audit.
Managing the Audit Day – Professionalism and Confidence
Audit day doesn’t have to feel like judgment day. If you’ve done the prep, this is simply your opportunity to show what you already do right. Still, the energy in the lab changes the moment assessors walk in — and how you manage that atmosphere can make all the difference.
Start Strong with the Opening Meeting
The audit usually begins with a short opening meeting between your team and the assessors. This sets the tone for the day. Use it to introduce key personnel, outline your schedule, and show that your lab is organized and cooperative.
Pro Tip: Keep introductions simple. Have one person lead — usually your Quality Manager — and briefly describe your lab’s structure and readiness. Confidence at this stage sends a clear message: “We’re in control.”
Assign Clear Roles
During the audit, everyone should know their role:
Audit Liaison: Main contact for assessors (usually the Quality Manager).
Document Controller: Quickly retrieves requested records.
Support Staff: Keep the environment running smoothly.
Common Mistake: Letting everyone talk at once. It creates confusion and gives the impression of disorganization. Always channel questions through your assigned liaison — calm, clear communication wins every time.
Stay Calm During Interviews
Assessors often walk up to staff and ask questions on the spot. That’s perfectly normal. The goal isn’t to intimidate — it’s to confirm competence and confidence.
If someone doesn’t know the answer, train them to respond honestly:
“I’m not sure, but I can show you where that’s documented.” That’s a professional, compliant answer. It shows your team knows how to use the system, not just memorize it.
Pro Tip: Remind staff to speak slowly, smile, and breathe. Assessors are people too — they appreciate sincerity over perfection.
Keep Records Accessible and Organized
When assessors ask for evidence — calibration logs, training records, QC results — retrieve them quickly. Slow or confused searches can make even a compliant system look weak.
Have your Audit Folder ready (digital or printed). This is your “go-to” hub for all requested records. Label files clearly and keep a backup on hand.
Example: One of our client labs used color-coded binders — green for quality documents, blue for calibration, red for CAPAs. During the audit, they retrieved every document in seconds. Assessors noticed — and commended their control.
Handle Observations Professionally
If an assessor notes a potential issue, stay composed. Listen fully, take notes, and ask clarifying questions. Never argue findings on the spot — it rarely ends well. Instead, thank them for the observation and assure them you’ll review it internally.
Pro Tip: Your reaction to findings says more about your quality culture than the findings themselves. Maturity and openness go a long way.
End Strong with the Closing Meeting
At the end of the day, assessors will summarize their observations and findings. This is your chance to demonstrate responsiveness. Clarify any misunderstandings respectfully and acknowledge legitimate gaps.
If findings are raised, don’t panic. Most labs receive a few — what matters is how you address them afterward.
Audits aren’t about perfection — they’re about proving control. When your team stays calm, communicates clearly, and handles findings with professionalism, you don’t just pass the audit — you earn your assessors’ respect.
Handling Nonconformities and Post-Audit Actions
No matter how well you prepare, almost every lab gets a few findings during an ISO 15189 audit. That’s normal. In fact, assessors expect to see a few — it shows your system is being used and not staged to look perfect. What really matters is how you respond once those findings are on the table.
Understand What Each Nonconformity Means
Not all findings carry the same weight. Here’s a quick breakdown:
Type
Meaning
Example
Major Nonconformity
A serious issue that affects reliability or compliance.
Missing equipment calibration or expired reagents in use.
Minor Nonconformity
A small deviation without direct risk to results.
A missing signature on a training form.
Observation / Opportunity for Improvement
A suggestion for better control or efficiency.
Using manual logs where digital tracking could improve traceability.
Knowing the difference helps you respond proportionally — without overreacting or ignoring the real priorities.
Step 1: Acknowledge, Don’t Argue
When findings are presented, listen first. Take detailed notes, and ask clarifying questions only after the assessor finishes. Resist the urge to defend or debate in the moment. Your professionalism during this stage matters just as much as the findings themselves.
Pro Tip: If something feels unclear, ask:
“Can you please confirm which clause this finding relates to?” It helps you target your corrective action accurately.
Step 2: Conduct Root-Cause Analysis
After the audit, gather your team to analyze each finding. Don’t stop at surface explanations like “staff forgot” or “equipment failed.” Dig deeper.
Try asking why at least five times:
The temperature log was incomplete. Why? → The technician forgot. Why? → The process wasn’t automated. Why? → There’s no reminder system. Now you’ve found the real issue — lack of system prompts, not staff negligence.
Common Mistake: Closing findings too quickly without true root-cause analysis. Assessors can tell when CAPAs are superficial.
Step 3: Implement Corrective Actions
For each finding, define:
What needs to be corrected (immediate fix)
Why it happened (root cause)
What will prevent recurrence (system improvement)
Who’s responsible and by when
Document everything — including proof of completion. Photos, updated forms, or revised SOPs all count as evidence.
Pro Tip: Link your CAPA log to your internal audit tracker. That way, you can easily demonstrate follow-up during your next assessment.
Step 4: Verify Effectiveness
A closed CAPA isn’t complete until you’ve confirmed it actually worked. This could mean:
Re-auditing the process
Checking records after a few weeks
Interviewing staff to ensure new procedures are followed
If the issue reappears, reopen the CAPA — that’s transparency, not failure.
Example: A client lab corrected an equipment maintenance issue but forgot to retrain the operator. The same finding resurfaced six months later. After adding a training step to the CAPA process, it never returned.
Step 5: Feed Findings into Management Review
Every major nonconformity and its CAPA should feed into your next management review. This shows a clear loop of continual improvement — exactly what ISO 15189 is built on.
Pro Tip: Highlight improvements made because of audit findings. It reframes audits from being “stress events” to “growth checkpoints.”
No lab ever passes with zero findings forever — and that’s okay. ISO 15189 isn’t about perfection; it’s about control, correction, and continual improvement. Handle nonconformities calmly, document every step, and show your system learns — that’s what accreditation bodies respect most.
FAQs – ISO 15189 Audit Preparation
Over the years, I’ve heard the same questions come up from laboratory managers preparing for ISO 15189 accreditation. These aren’t just theoretical — they come from real labs facing real pressures. Let’s clear up the confusion with straightforward, experience-based answers.
Q1. How long does it take to prepare for an ISO 15189 accreditation audit?
It depends on your starting point. If your quality system is already established, you’ll typically need 3 to 6 months for focused audit preparation — time to run a full internal audit, close CAPAs, and train your staff. If you’re starting from scratch, expect 9 to 12 months before you’re fully ready for external assessment.
Pro Tip: Don’t rush the documentation. It’s better to go slow and build control than to go fast and patch gaps later.
Q2. Can internal staff serve as auditors before accreditation?
Yes — and they should. ISO 15189 encourages internal audits as part of your readiness. Just make sure auditors are impartial — they shouldn’t audit their own work or department. If your lab is small, rotate responsibilities or invite a consultant once a year for an objective review.
Example: One regional diagnostic center I coached swapped auditors between microbiology and hematology sections. Both teams improved awareness, and assessors praised their impartial audit approach.
Q3. What should we do if we fail the initial audit?
Don’t panic. A “failed” audit doesn’t mean you’re disqualified — it means the accreditation body needs proof that your nonconformities were corrected. You’ll receive a report outlining what went wrong. Address each issue using a proper Corrective Action Plan (CAPA), submit evidence, and schedule a follow-up review if needed.
Pro Tip: Be transparent with assessors. They appreciate honesty and genuine improvement more than rushed “fixes.”
Q4. How do I keep my lab always audit-ready?
Build audit readiness into your everyday routine:
Keep documents updated immediately after revisions.
Schedule internal audits quarterly instead of annually.
Review CAPA progress during every management meeting.
Conduct short “refresher huddles” with staff each month.
Audit readiness shouldn’t be a once-a-year event — it should feel like business as usual.
Q5. What’s the best way to calm staff nerves on audit day?
Remind them that the audit isn’t a test — it’s a conversation. Assessors aren’t looking for perfect answers; they’re checking for understanding and control. Encourage staff to speak honestly, refer to documented procedures, and ask for clarification if unsure.
Pro Tip: A quick team pep talk before the audit works wonders. A calm, confident mindset reflects your lab’s quality culture better than any binder ever could.
When your team understands these key questions, your entire preparation strategy becomes smoother. You move from reacting to every audit request to anticipating what assessors will need — and that’s the real sign of maturity in any quality system.
Turning Audit Stress into Accreditation Success
Here’s the thing about ISO 15189 accreditation — the audit isn’t the enemy. It’s the checkpoint that proves your lab is consistent, competent, and trustworthy. Once you stop viewing it as an obstacle and start treating it as validation, everything changes.
The labs that pass with confidence don’t just prepare for audits — they live ready. Their documents are current. Their staff understand their roles. Their equipment records are traceable at a glance. And most importantly, they use every audit as a tool to strengthen their system, not just satisfy the assessor.
Quick Recap
Here’s what solid audit preparation looks like:
Start early — plan 60–90 days ahead.
Conduct an honest internal audit and act on the findings.
Keep documentation clean, controlled, and accessible.
Train your staff to speak confidently and naturally.
Handle nonconformities as opportunities, not failures.
Each of these steps builds your credibility, one audit at a time.
Final Thought
In my experience, once a lab completes its first accreditation audit successfully, something shifts — the fear turns into pride. Your team realizes that ISO 15189 isn’t about bureaucracy; it’s about quality, safety, and patient trust. That’s when the standard stops being a checklist and starts being your culture.
Your Next Step
If you want to simplify your audit preparation, don’t reinvent the wheel. Use tools built by professionals who’ve walked this path before.
[Download the ISO 15189:2022 Audit Preparation Checklist] (insert button or link) It includes the same templates and workflows we use to help laboratories worldwide achieve accreditation faster — and with fewer findings.
Prepare smart. Stay consistent. And when audit day comes, walk in ready — because you’ve already done the real work.
👋 Hi, I’m HAFSA, and for the past 12 years, I’ve been on a journey to make ISO standards less intimidating and more approachable for everyone.
Whether it’s ISO 9001, ISO 22000, or the cosmetics-focused ISO 22716, I’ve spent my career turning complex jargon into clear, actionable steps that businesses can actually use.
I’m not here to call myself an expert—I prefer “enthusiast” because I truly love what I do.
There’s something incredibly rewarding about helping people navigate food safety and quality management systems
in a way that feels simple, practical, and even enjoyable.
When I’m not writing about standards, you’ll probably find me playing Piano 🎹, connecting with people, or diving into my next big project💫.
I’m an engineer specialized in the food and agricultural industry
I have a Master’s in QHSE management and over 12 years of experience as a Quality Manager
I’ve helped more than 15 companies implement ISO 9001, ISO 22000, ISO 22716, GMP, and other standards
My clients include food producers, cosmetics manufacturers, laboratories, and service companies
I believe quality systems should be simple, useful, and efficient.