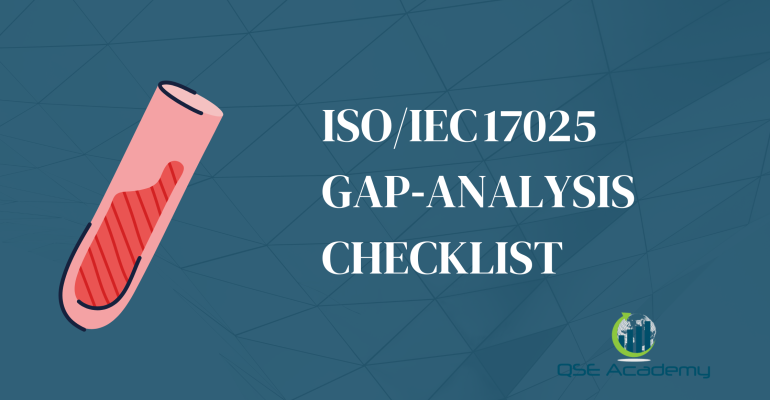
ISO/IEC 17025 Gap‑Analysis Checklist
Last Updated on October 13, 2025 by
Why Every Laboratory Needs a Proper ISO/IEC 17025 Gap-Analysis Checklist
I’ve met dozens of labs eager to get accredited, and most start in the same place — halfway into documentation before knowing what’s actually missing. That’s like starting a road trip without checking the map. You’ll get somewhere, but not necessarily where you meant to go.
That’s why the ISO/IEC 17025 Gap-Analysis Checklist is such a game-changer. It gives you a clear picture of where your lab stands today versus where it needs to be to meet the standard.
In my experience, labs that skip this step almost always end up backtracking later — rewriting procedures, retraining staff, or redoing calibration records that didn’t align with the clauses. Those that start with a structured gap analysis? They move faster, with less confusion and fewer surprises during accreditation audits.
Here’s what this article will walk you through:
-
What a gap analysis really is (and why it’s more than just a checklist).
-
How to prepare your team and gather the right evidence.
-
How to use the checklist clause by clause to identify real gaps — not just paperwork gaps.
-
How to turn your findings into an actionable implementation plan.
By the end, you’ll have a simple, step-by-step way to assess your readiness — whether you’re aiming for SANAS, A2LA, or UKAS accreditation.
Understanding What a Gap Analysis Really Means (ISO/IEC 17025 Gap-Assessment Basics)
When I first started guiding labs through ISO/IEC 17025, the term gap analysis sounded intimidating to most teams. They imagined a complex audit or some kind of pass-or-fail test. In reality, it’s not that at all — it’s your lab’s baseline assessment, your first honest look at how close (or far) you are from full compliance.
A proper gap analysis simply compares what you’re doing now with what the standard expects. It’s not about blame or judgment — it’s about clarity.
Why It Matters
I once worked with a small calibration lab that thought they were “almost ready” for accreditation. But once we ran the gap analysis, they discovered three major blind spots:
-
No formal method validation records.
-
Incomplete traceability documentation for reference standards.
-
And training logs without competence evaluations.
They weren’t failing — they were just missing structure. Once they had visibility, fixing those issues became straightforward.
That’s the power of a good gap analysis: it tells you exactly where to focus your time and resources.
What a Gap Analysis Covers
Your ISO/IEC 17025 gap assessment should align with the main clauses of the standard:
-
Clause 4: General requirements — impartiality, confidentiality, and independence.
-
Clause 5: Structural requirements — management and organizational setup.
-
Clause 6: Resources — personnel, facilities, and equipment.
-
Clause 7: Process — method validation, sampling, testing, reporting.
-
Clause 8: Management system — documentation, audits, and reviews.
Each clause is like a checkpoint. You ask:
-
Do we have a documented process for this?
-
Are we following it consistently?
-
Can we show records as evidence?
Pro Tip
Treat your gap analysis as a diagnostic, not an audit. The goal isn’t to “pass” — it’s to identify every opportunity for improvement before your accreditation body ever steps foot in your lab.
Common Mistakes to Avoid
-
Rushing the process. A gap analysis done in one afternoon won’t uncover the real issues.
-
Focusing only on paperwork. ISO 17025 is as much about competence and consistency as it is about documents.
-
Ignoring technical requirements. Don’t stop at quality procedures — dig into equipment, calibration, and measurement uncertainty.

Preparing for the Gap Analysis (How to Get Started Right)
Before you even open the checklist, there’s one thing I always remind teams: a gap analysis is only as good as the preparation behind it.
If you go in cold, without documents or the right people, you’ll end up with a half-accurate picture — and that’s worse than no picture at all.
So, let’s talk about how to set yourself up properly before you start assessing.
Step 1: Assemble the Right Team
A gap analysis isn’t a one-person job. You’ll need a small team that represents both quality and technical sides of your laboratory.
Here’s the mix that works best:
-
Quality Manager: Leads the process, ensures the assessment aligns with the ISO/IEC 17025 clauses.
-
Technical Manager: Evaluates technical competence — methods, equipment, measurement traceability.
-
Section Heads / Supervisors: Provide real insight into daily lab activities and workflows.
-
Document Controller: Tracks records, forms, and versions during the review.
Pro Tip: Don’t do it behind closed doors. Involve your team — they’ll catch things you won’t. Plus, you’ll build buy-in for the improvements that follow.
Step 2: Gather Your Evidence
Before the session begins, collect every key document and record that shows how your lab operates.
Think of it as your evidence folder:
-
Quality Manual
-
SOPs and test/calibration methods
-
Equipment calibration and maintenance records
-
Training and competency evaluations
-
Internal audit reports
-
Customer feedback and complaint records
-
Management review minutes
Having these ready means you’re not flipping through files while answering “Do we have this procedure?” halfway through the checklist.
Step 3: Review Past Lessons
If your lab has gone through internal audits or previous accreditation attempts, pull those reports too.
They’re gold mines for identifying recurring weaknesses.
I once worked with a testing lab that kept seeing the same issue — incomplete sample traceability. It appeared in every internal audit report, yet never got resolved. The gap analysis finally forced them to fix it properly.
Step 4: Plan the Sessions
Break your gap analysis into focused sessions, one for each main clause group:
-
Session 1: Clauses 4 & 5 (General and Structural)
-
Session 2: Clause 6 (Resources)
-
Session 3: Clause 7 (Process)
-
Session 4: Clause 8 (Management System)
Give each session a clear owner and a half-day block of time.
This keeps the pace manageable and ensures you dig deep enough into each area.
Pro Tip: Document findings in real time — don’t rely on memory or handwritten notes.
Common Pitfalls
-
Doing it alone: One person can’t see all operational gaps.
-
Starting without documents: You’ll waste time debating what exists.
-
Skipping time allocation: Trying to finish everything in one day leads to missed details.
Using the ISO/IEC 17025 Gap-Analysis Checklist (Step-by-Step Process)
Now that you’ve got your team ready and your documents in hand, it’s time to roll up your sleeves and use the checklist.
This is where theory turns into action — where you discover exactly how far (or close) your lab is from ISO/IEC 17025 compliance.
Over the years, I’ve seen too many labs treat the checklist like a yes-or-no survey. It’s not.
A proper gap analysis digs into evidence, not opinions. It’s not about “we think we do this.” It’s about “here’s the record that proves we do.”
Step 1: Review Each Clause Requirement
Start from Clause 4 and work your way to Clause 8.
For each requirement, read it carefully and translate it into plain language your team understands.
For example:
Clause 6.2 – Personnel competence
“Do we have records proving each technician is competent for the tests or calibrations they perform?”
That’s all it means. Keep it practical, not academic.
Pro Tip: If your team doesn’t understand a clause, don’t guess. Note it and come back later with an ISO 17025 consultant or reference guide. Guessing leads to wrong assumptions — and more rework later.
Step 2: Compare Against Current Practice
Once you understand the clause, ask:
-
Do we have a documented process for this?
-
Do we follow it consistently?
-
Do we have records or evidence?
If the answer to all three is “yes,” you’re compliant.
If you’re missing documentation, training, or proof — that’s your gap.
Step 3: Rate Your Compliance Level
I recommend using a simple three-point scale — easy to apply and visualize:
| Score | Meaning | Action Needed |
|---|---|---|
| 2 | Fully compliant | Maintain system & evidence |
| 1 | Partially compliant | Review and improve procedure or evidence |
| 0 | Non-compliant | Create or implement required process |
You can color-code it (green/yellow/red) if you’re using Excel — makes trends easy to spot later.
Step 4: Record Findings Clearly
For each clause, capture:
-
Observation: What did you find?
-
Evidence: Which record or procedure supports it?
-
Gap Identified: What’s missing or weak?
-
Action Needed: What will fix it?
-
Responsible Person / Target Date: Who will handle it and by when?
Example:
| Clause | Observation | Gap Identified | Action Needed | Owner | Due Date |
|---|---|---|---|---|---|
| 6.4 Equipment | Calibration certificates available, but traceability to SI units not shown. | Lack of documented traceability chain. | Add reference standard traceability table. | Technical Manager | 15 Nov 2025 |
Step 5: Review and Validate Results
Once your team finishes the checklist, schedule a short debrief.
Discuss patterns:
-
Which clauses scored the lowest?
-
Are gaps mostly in documentation or training?
-
Do several sections point to the same root issue (e.g., unclear roles or outdated SOPs)?
This session is where insights turn into priorities.
Pro Tip: Don’t aim for perfection on the first round. The goal is visibility — your first complete picture of where you stand.
Common Mistakes to Avoid
-
Filling in answers without evidence. “We do this” isn’t proof.
-
Skipping partial compliance. If something’s only halfway implemented, mark it as “1,” not “2.”
-
Letting the checklist sit untouched. The results mean nothing unless you act on them.
Core Sections to Evaluate (ISO/IEC 17025 Clause-by-Clause Overview)
Here’s where your checklist really earns its value.
Each clause in ISO/IEC 17025 looks straightforward on paper — until you start comparing it to how your lab actually operates.
This section walks you through the five main parts of the standard, what to look for, and what I’ve seen labs miss most often.
Clause 4 – General Requirements: Impartiality & Confidentiality
Start by asking the basics:
-
Are there potential conflicts of interest between testing, calibration, and customer activities?
-
Is impartiality documented and reviewed regularly?
-
How do you protect client data and results?
Common Gap:
Labs often assume impartiality because “we’re professionals.” But accreditation bodies want evidence — signed declarations, impartiality risk assessments, and confidentiality agreements.
Pro Tip:
Keep a simple “Impartiality Log.” Record any risks or relationships that could influence results — and how they were managed. It shows assessors you take objectivity seriously.
Clause 5 – Structural Requirements: Defining Roles and Responsibilities
This is your lab’s backbone.
You need to show who’s responsible for what — and that the structure supports independence and technical control.
Ask yourself:
-
Are roles clearly defined and documented?
-
Does the organizational chart match how work actually happens?
-
Who has the authority to release test or calibration results?
Common Gap:
A mismatch between the org chart and reality. I once audited a lab where the chart said the Quality Manager approved reports — but in practice, technicians were signing them off.
Pro Tip:
Update your structure annually. Even small staff changes can affect accreditation scope or responsibilities.
Clause 6 – Resource Requirements: People, Equipment, and Environment
This clause is where most labs uncover real gaps.
Check these areas:
-
Personnel: Are competency records and training matrices up-to-date?
-
Equipment: Are calibration certificates traceable to national or international standards?
-
Facilities: Are environmental conditions controlled and recorded where required?
Common Gap:
Labs often have calibration certificates but no documented traceability chain to the SI units — a big red flag for auditors.
Pro Tip:
Create an “Equipment Master List” showing each item’s calibration status, location, and traceability reference.
Clause 7 – Process Requirements: The Core of Your Operations
This section is where your daily work meets the standard.
Evaluate:
-
How you review requests, select methods, and validate them.
-
Whether samples, test items, or calibration equipment are properly identified and handled.
-
How you report results — are reports traceable, clear, and authorized?
Common Gap:
Incomplete or missing method validation records — especially for non-standard or modified methods.
Pro Tip:
Maintain a short “Method Validation Summary Sheet” for each test or calibration — it helps demonstrate competence fast during audits.
Clause 8 – Management System Requirements: The Quality Framework
This is the part that ties everything together — your documentation, audits, and continual improvement cycle.
Ask:
-
Are documents controlled with proper versioning and approvals?
-
Are internal audits scheduled and followed up?
-
Are management reviews meaningful, not just a checkbox exercise?
Common Gap:
Labs often complete internal audits but forget to verify the effectiveness of corrective actions. That’s a repeat finding waiting to happen.
Pro Tip:
Add a “Corrective Action Follow-up Log.” Each finding should have closure evidence reviewed by the Quality Manager.
Bringing It All Together
When you finish reviewing these five areas, patterns will start to emerge — maybe you’re strong in documentation but weak in training, or technically sound but missing records of impartiality.
Those trends are gold. They tell you exactly where to focus your ISO/IEC 17025 improvement efforts next.
Interpreting Results and Prioritizing Actions (From Gaps to Game Plan)
Once you’ve finished your ISO/IEC 17025 gap analysis, you’ll probably be staring at a long list of findings — some big, some minor, and a few that make you wonder how they slipped by unnoticed. Don’t worry, that’s normal.
The goal now isn’t to fix everything overnight. It’s to interpret what your checklist tells you and turn it into a practical improvement plan that moves your lab toward accreditation with focus, not chaos.
Step 1: Group Your Findings
Start by categorizing your gaps. This helps you see where your biggest weaknesses are. I usually recommend sorting them into four buckets:
-
Documentation Gaps: Missing or outdated procedures, unclear forms, or uncontrolled records.
-
Technical Gaps: Missing method validation, calibration issues, or lack of traceability.
-
Competence Gaps: Staff not fully trained or competency records incomplete.
-
System Gaps: Missing internal audits, management reviews, or corrective action follow-ups.
When you visualize your findings this way, you’ll often see patterns — like 70% of your gaps coming from documentation or equipment control. That tells you where to focus your energy first.
Step 2: Prioritize Based on Risk and Impact
Not all gaps are created equal.
Fixing a typo in your quality manual isn’t as critical as missing traceability in your calibration records.
Here’s how I help teams prioritize:
| Priority Level | Description | Example |
|---|---|---|
| High (Critical) | Affects accuracy, impartiality, or validity of results | Missing method validation or calibration traceability |
| Medium | Affects consistency or record completeness | Incomplete training records or audit follow-ups |
| Low | Cosmetic or minor documentation issues | Outdated reference in procedure |
Focus on closing high-risk items first — these are the ones auditors and accreditation bodies zero in on.
Pro Tip: Create a simple “Action Register” with columns for gap category, priority, responsible person, and deadline. It keeps everything visible and trackable.
Step 3: Assign Ownership
Every gap needs an owner.
If “everyone” is responsible, no one is.
Assign one person for each corrective action and make sure they understand:
-
What the gap is.
-
Why it matters.
-
When it must be closed.
I’ve seen labs transform just by making ownership visible — once people know they’re accountable, progress happens.
Step 4: Set Realistic Deadlines
ISO/IEC 17025 implementation isn’t a sprint. Trying to close 50 findings in a week guarantees burnout and mistakes.
Instead, pace it:
-
High-priority gaps: within 30 days.
-
Medium: 60–90 days.
-
Low: 120 days or before your next internal audit.
Tie these timelines to your project plan (if you’re using one) so you can track progress at management review meetings.
Step 5: Verify and Document Closures
Every time you fix a gap, record the evidence.
For example:
| Gap Identified | Corrective Action | Verification Evidence | Status |
|---|---|---|---|
| No method validation for non-standard test | Conducted validation study, updated SOP | Validation report VAL-2025-01 approved | Closed |
This not only keeps your progress organized — it becomes proof during your accreditation audit that you’ve done your due diligence.
Common Mistakes
-
Trying to fix everything at once. It leads to fatigue and missed details.
-
Ignoring verification. Closing a gap on paper isn’t enough — you must prove the solution works.
-
Not updating the team. If staff don’t know what’s changed, old habits will creep back.
Pro Tip
Think of your gap analysis results as a launchpad, not a checklist to shelve. It’s your project roadmap — one that helps you allocate time, assign responsibility, and measure progress as you move toward accreditation.
Turning Findings into a Roadmap (Building Your ISO/IEC 17025 Implementation Plan)
By now, you’ve done the hard part — you know exactly where your lab stands. The next step is what separates a productive gap analysis from a forgotten spreadsheet: turning those findings into a living roadmap.
In my experience, this is where most labs stumble. They complete the checklist, feel a sense of accomplishment, and then… nothing happens. The document sits in a shared drive while real issues linger. The truth? Your gap analysis only has value if it turns into consistent, structured action.
Let’s make sure that happens.
Step 1: Convert Gaps into Actionable Tasks
Take every finding from your checklist and rewrite it as a clear, doable task.
Instead of “Clause 7.2 – method validation incomplete,” write:
“Conduct method validation for spectrophotometer test per ISO 17025 clause 7.2; document results and update SOP-LAB-07 by November 30.”
That’s specific, measurable, and actionable — exactly what you need to drive results.
Pro Tip: Treat your roadmap like a project tracker. If you’re using Excel, add filters for clause, priority, and owner. If you’re using project software (like Trello or Asana), turn each gap into a card with deadlines and attachments.
Step 2: Set Milestones and Timeframes
You don’t need to fix everything at once — but you do need a timeline that keeps the work moving.
Here’s a simple way to structure it:
| Phase | Duration | Main Focus |
|---|---|---|
| Month 1 | High-priority fixes (critical technical gaps, traceability, documentation control) | |
| Month 2–3 | Medium-level actions (training, competence, internal audit planning) | |
| Month 4–5 | Remaining low-level updates and improvement verification | |
| Month 6 | Readiness check and pre-assessment |
I’ve seen this 6-month rhythm work beautifully — it’s steady, realistic, and keeps management engaged.
Step 3: Assign Responsibilities Clearly
Remember your team from Section 2.2? Now’s the time to use them.
Assign each major clause area to a specific person:
-
Quality Manager: Clauses 4, 5, 8 – structure, documentation, and system.
-
Technical Manager: Clause 6, 7 – methods, traceability, and competence.
-
Section Heads: Department-level tasks like updating SOPs and training logs.
Make it visible — even a simple whiteboard tracker in the lab goes a long way.
Step 4: Monitor Progress and Report Regularly
Your roadmap should include a progress review at least once every two weeks.
Keep it light but consistent:
-
What’s completed?
-
What’s delayed?
-
What barriers need management support?
I once helped a calibration lab introduce a short “ISO Update” meeting every Friday — 15 minutes, that’s it. In three months, they cleared 80% of their action items.
Pro Tip: Always celebrate milestones. Recognizing progress builds momentum and keeps the team engaged.
Step 5: Integrate It with Your Management System
Your roadmap shouldn’t live separately from your QMS — it is part of it.
Link your actions to your Corrective Action Log and Management Review Agenda. This ensures accountability and creates evidence that you’re continuously improving — something auditors love to see.
Common Mistakes to Avoid
-
No follow-through: Labs often stop after listing actions but never track them.
-
Vague ownership: “Team to review” isn’t ownership. Assign a name.
-
No verification: If you don’t check whether fixes worked, you’ll repeat the same findings later.
Real Example
A small materials testing lab I worked with found 47 gaps in their initial analysis. We turned each into an action, built a six-month roadmap, and held 10-minute weekly reviews. By Month 5, they passed their pre-assessment audit with only one minor nonconformity.
Their secret? Clarity + consistency.
Final Thought
Your ISO/IEC 17025 gap analysis is your blueprint.
Treat it as the foundation for your roadmap — not just a report. Once you start executing, tracking, and verifying improvements, you’re not just “getting ready for accreditation.” You’re building a system that lasts.
FAQs: Common Questions About the ISO/IEC 17025 Gap-Analysis Checklist
After running gap analyses for labs across industries — from small calibration facilities to national testing centers — I’ve noticed a pattern.
The same few questions always come up, especially right after teams finish their first checklist. Let’s address those clearly and practically.
Q1: How long does an ISO/IEC 17025 gap analysis take?
It depends on your lab’s size and complexity, but generally:
-
Small labs (under 10 staff): 2–3 days of focused sessions.
-
Medium labs: 1 week, especially if you’re reviewing multiple disciplines.
-
Large or multi-site labs: 2–3 weeks including evidence collection.
If you’re organized and prepare documents in advance (see Section 2.2), you can cut that time in half.
Pro Tip: Don’t rush it. A thorough gap analysis saves you weeks during implementation and prevents costly rework later.
Q2: Can we do the gap analysis ourselves, or do we need a consultant?
You absolutely can do it yourself — many labs do. The key is honesty and understanding of the standard.
However, a consultant brings two major benefits:
-
Objectivity: It’s hard to spot your own weaknesses. External reviewers see what you miss.
-
Experience: A seasoned ISO 17025 consultant knows how accreditation bodies interpret clauses — which can save you from technical surprises later.
In my experience, the best approach is a hybrid one: do your internal review first, then bring in a consultant for validation or second opinion. That way, you build understanding and confidence.
Q3: Is the same gap-analysis checklist used for both testing and calibration laboratories?
Yes — the structure is the same because the standard is the same.
The difference lies in how you interpret and evidence certain clauses:
-
A testing lab focuses on sample handling, method validation, and reporting accuracy.
-
A calibration lab emphasizes measurement traceability, uncertainty calculations, and equipment control.
The checklist framework stays identical — you just tailor the evidence and examples to your operations.
Q4: What should we do if we find major gaps during the analysis?
First, don’t panic — that’s exactly what the checklist is for.
Document the issue clearly, assign ownership, and set a realistic deadline.
If it’s a critical process gap (like missing calibration traceability or unvalidated methods), tackle it immediately and record your corrective actions.
Auditors care far more about how you respond to findings than about the findings themselves.
Pro Tip: Use the “high-priority first” rule from Section 2.5 — fix what directly affects data validity or customer trust.
Q5: How often should we perform a gap analysis?
Ideally, once a year — and always before:
-
Expanding your scope of accreditation.
-
Major changes to methods, equipment, or key personnel.
-
Preparing for reaccreditation or surveillance audits.
Think of it as your annual system health check.
Turning Your Gap Analysis Into Real ISO/IEC 17025 Progress
If there’s one thing I want every lab to understand, it’s this — a gap analysis isn’t the end of your ISO/IEC 17025 journey; it’s the beginning of real progress.
It’s not just a checklist. It’s your roadmap, your mirror, and your motivator.
Key Takeaways
Here’s what this process really gives you:
-
Clarity: You’ll finally know exactly where your lab stands against ISO/IEC 17025.
-
Focus: Instead of guessing what to fix, you’ll know what matters most.
-
Accountability: Every gap turns into an action with a name and deadline attached.
-
Confidence: By the time assessors arrive, you’ll already have verified and improved every area that once felt uncertain.
I’ve seen this firsthand: the labs that commit to a structured, honest gap analysis end up smoother, faster, and far more confident when the accreditation audit comes around.
Real Experience in Action
When I worked with a materials testing lab a few years back, they started their ISO/IEC 17025 journey by running our gap-analysis checklist.
They discovered over 40 gaps — mostly small things: inconsistent training logs, missing traceability charts, outdated SOPs.
Within five months, every single one was closed through a focused implementation plan. Their audit resulted in zero major findings.
That’s the difference preparation makes.
Reinforcing Trust and Expertise
At QSE Academy, our consultants have helped hundreds of labs — calibration, testing, chemical, mechanical, and environmental — perform gap analyses and move confidently into accreditation.
We know how daunting it feels to look at the standard’s clauses for the first time. That’s why we built our ISO/IEC 17025 Gap-Analysis Checklist — practical, clear, and ready for use by any lab, anywhere.
Your Next Step
If you’re ready to take your lab from uncertainty to clarity:
Download the Complete ISO/IEC 17025 Gap-Analysis Checklist — it includes clause-by-clause guidance, scoring, and examples.
Or work directly with our ISO/IEC 17025 consultants — we’ll interpret your results, help prioritize actions, and build your implementation roadmap step by step.
You already have the skills, the equipment, and the commitment.
Now it’s time to add structure — and start building the foundation for a successful ISO/IEC 17025 accreditation.
I hold a Master’s degree in Quality Management, and I’ve built my career specializing in the ISO/IEC 17000 series standards, including ISO/IEC 17025, ISO 15189, ISO/IEC 17020, and ISO/IEC 17065. My background includes hands-on experience in accreditation preparation, documentation development, and internal auditing for laboratories and certification bodies. I’ve worked closely with teams in testing, calibration, inspection, and medical laboratories, helping them achieve and maintain compliance with international accreditation requirements. I’ve also received professional training in internal audits for ISO/IEC 17025 and ISO 15189, with practical involvement in managing nonconformities, improving quality systems, and aligning operations with standard requirements. At QSE Academy, I contribute technical content that turns complex accreditation standards into practical, step-by-step guidance for labs and assessors around the world. I’m passionate about supporting quality-driven organizations and making the path to accreditation clear, structured, and achievable.
Related Posts