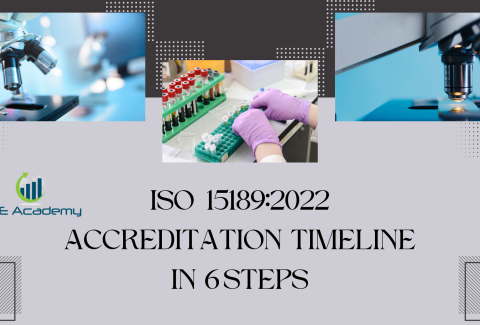
ISO/IEC 17025 Accreditation Timeline in 6 Steps
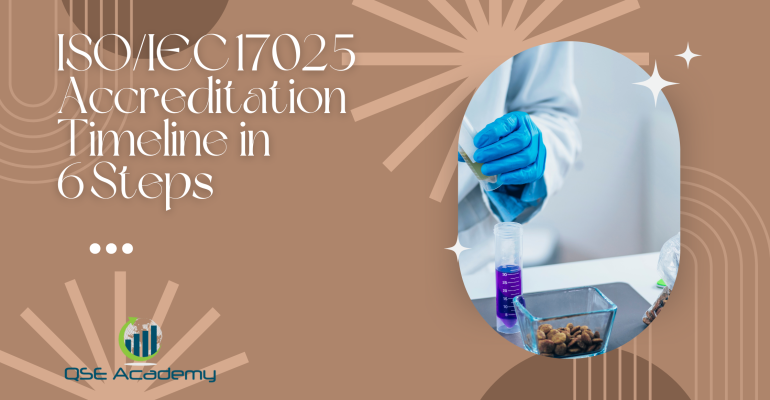
ISO/IEC 17025 Accreditation Timeline in 6 Steps
Last Updated on October 13, 2025 by
How Long Does ISO/IEC 17025 Accreditation Really Take?
One of the first questions I hear from labs starting their accreditation journey is:
“How long will this actually take?”
And it’s a fair question—because time affects everything. Your schedule, your client commitments, your resources, and, yes, your budget.
But here’s the truth: there’s no single answer. I’ve seen labs finish in four months and others stretch beyond a year. The difference isn’t luck—it’s planning.
In my experience, most labs underestimate how structured the ISO/IEC 17025 process really is. It’s not just about passing an audit. It’s a series of steps—each one building on the last—that transforms your lab from “compliant on paper” to “competent in practice.”
That’s why I like to map the accreditation journey into six practical steps:
-
Preparation & Gap Analysis
-
Documentation Development & Implementation
-
Staff Training & Competency Verification
-
Internal Audit & Management Review
-
Application & Pre-Assessment
-
Final Assessment & Accreditation Decision
Each stage has its own rhythm and timeline.
By understanding what happens in each, you can plan your resources, keep momentum, and hit your accreditation goal without unnecessary delays.
Let’s walk through it—step by step.
Step 1 – Preparation & Gap Analysis (2–4 Weeks)
Every successful accreditation starts with a reality check. Before you even think about writing procedures or booking assessors, you need to know where your lab stands right now. That’s what a gap analysis is all about—comparing your current operations to the full set of ISO/IEC 17025 requirements.
I’ve seen too many labs skip this step, only to backtrack months later fixing issues they could’ve caught on day one. A clear gap analysis saves time, frustration, and money.
What Happens in This Stage
-
Review your existing policies, test methods, and calibration practices.
-
Identify missing or outdated documents.
-
Check whether equipment calibrations and reference standards are traceable.
-
Evaluate staff competence and training records.
-
Compare your processes against each clause of ISO/IEC 17025.
Think of it as your diagnostic test—the clearer the results, the more targeted your next moves.
Pro Tip
Use a structured checklist or template aligned with ISO/IEC 17025 clauses. It keeps you objective and ensures you don’t miss smaller items like document control or impartiality statements.
If you’re using a consultant or toolkit (like QSE Academy’s gap checklist), this step can take just a couple of weeks instead of dragging into months.
Common Pitfall
Jumping straight into writing documents without understanding what needs to change. You’ll end up rewriting everything later.
The goal here isn’t to impress auditors—it’s to get a crystal-clear view of what’s already working and what’s not.
Example from the Field
A small mechanical calibration lab I worked with took three weeks for its gap analysis. By the end, they had a one-page list of “must-fix” gaps and another list of “minor improvements.” That clarity helped them build documents efficiently—and they were ready for accreditation in five months flat.
This step sets the tone for your entire project. A strong start here means fewer surprises later, smoother documentation work, and a faster path to accreditation.

Step 2 – Documentation Development & Implementation (6–10 Weeks)
Once you know your gaps, it’s time to start building—or refining—your ISO/IEC 17025 documentation system.
This is the stage where your quality manual, procedures, and records come to life. It’s also where many labs start to feel overwhelmed, because documentation can feel like a mountain of work. But if you tackle it methodically, it’s far easier than most people expect.
In my experience, this stage takes anywhere from six to ten weeks, depending on your lab’s size, scope, and how much is already in place.
What Happens in This Stage
You’ll be developing and implementing:
-
Quality Manual: The top-level document that defines your lab’s policies and how you meet ISO/IEC 17025 requirements.
-
Standard Operating Procedures (SOPs): Step-by-step methods for technical and management activities.
-
Forms and Records: For calibration data, method validation, uncertainty calculations, complaints, nonconformities, and training.
-
Control of Documents and Records: A system to ensure revisions, approvals, and version tracking are all consistent.
Pro Tip
Don’t write from scratch.
Start with a customizable documentation template that already follows the ISO/IEC 17025 clause structure. You’ll save weeks of formatting, version control, and clause cross-referencing.
One of my clients used a ready-made documentation package and finished their entire system in seven weeks. A similar lab that wrote everything from zero took nearly four months.
Implementation Counts Too
Writing is only half the job. You’ll also need to:
-
Train staff on new procedures.
-
Start using the forms and recording actual data.
-
Ensure everyone follows the same version of each document.
Remember, auditors will check that your procedures aren’t just written—but actually used.
Common Pitfall
Creating overly complex documentation that looks great on paper but doesn’t fit how your lab really works.
Keep it practical. If your technicians can’t follow it easily, it’s too complicated.
Example from the Field
A small chemical testing lab tried to “mirror” another company’s documentation. It looked perfect—until the assessor asked technicians about their sample-handling SOP. No one could explain it because it wasn’t how they actually worked. They had to rewrite three procedures after the audit.
Lesson learned: your system must reflect your actual operations.
Step 3 – Staff Training & Competency Verification (2–4 Weeks)
At this stage, your documents are in place—but they’re only as effective as the people using them.
This is where you turn your written system into action by ensuring your team understands it and can demonstrate competence during the audit.
In my experience, labs that treat this step seriously often cut audit findings in half. Assessors can tell immediately when a team is trained, confident, and aligned.
What Happens in This Stage
You’ll focus on three main activities:
-
Awareness Training – Make sure everyone understands the basics of ISO/IEC 17025: impartiality, traceability, uncertainty, and the structure of your QMS.
-
Technical Competence Verification – Evaluate each staff member’s skills for the methods they perform—observations, proficiency tests, or supervised evaluations all count.
-
Internal Auditor Training – Select and train at least one person (ideally two) to conduct internal audits. Accreditation bodies often ask for proof of this.
This phase is where your quality system becomes real. Your people start connecting procedures to daily practice.
Pro Tip
Keep your training practical. Don’t overwhelm your staff with theory-heavy PowerPoints.
Walk through real scenarios—“How do we record uncertainty?” “What happens when a customer complaint comes in?”—and document attendance with training records and evaluation forms.
Auditors don’t care how long your training was; they care that your staff can demonstrate competence.
Common Pitfall
Some labs think a single group training is enough. It’s not.
You need individual competence evidence—like observation records or calibration repeatability tests. Assessors will want to see those during the audit.
Example from the Field
A medium-sized calibration lab I worked with turned training into short weekly sessions. Each technician taught one part of their process to the group.
Not only did it build confidence, but it also uncovered small inconsistencies in how tests were performed. Fixing those early saved them multiple nonconformities during the audit.
Timeline Tip:
If you integrate training with your documentation rollout, you can complete this stage in just two to four weeks.
Think of it as reinforcing what you’ve built—training makes your management system stick.
Step 4 – Internal Audit & Management Review (3–4 Weeks)
Here’s where you stress-test your entire system before the real audit happens.
The internal audit and management review are like a full rehearsal — they confirm whether your system actually works under pressure and whether your team is ready to face external assessors.
In my experience, this stage separates the labs that pass smoothly from the ones that spend months chasing corrective actions after the assessment.
What Happens in This Stage
1. Conduct the Internal Audit
Your internal audit should cover every clause of ISO/IEC 17025 — from impartiality and document control to technical methods and uncertainty calculations.
The goal isn’t just to check boxes, but to verify effectiveness.
You’ll:
-
Audit both management and technical requirements.
-
Interview staff and observe testing or calibration.
-
Review calibration records, equipment logs, and training files.
-
Identify any nonconformities, observations, or improvement opportunities.
Pro tip: Use an audit checklist based directly on the ISO/IEC 17025 clauses. It keeps your audit structured and ensures nothing slips through.
2. Address Nonconformities
Don’t just list them—analyze root causes and take real corrective actions.
Assessors will review your internal audit report and want to see that you didn’t just “note” issues, but actually fixed them effectively.
Common pitfall: Writing “staff retrained” as your only corrective action. That’s a band-aid, not a fix. Look deeper—why did the issue occur?
3. Conduct the Management Review
Once the internal audit is done, it’s time for management to review the entire system’s performance.
You’ll evaluate:
-
Audit results and corrective actions
-
Customer feedback or complaints
-
Equipment status and calibration
-
Staff training and competence
-
Quality objectives and resource needs
Record meeting minutes and document any decisions made.
This review shows assessors that top management is actively involved — not just approving documents from a distance.
Pro Tip
Treat your internal audit as a mock accreditation.
Ask your internal auditors to challenge your system like an external assessor would.
The more issues you find now, the fewer surprises you’ll have later.
Example from the Field
A mid-sized environmental testing lab I worked with found seven minor nonconformities during its internal audit.
They resolved all of them before the accreditation assessment — and their actual audit report came back clean.
The internal audit didn’t slow them down; it made them faster.
Timeline Tip:
This stage usually takes three to four weeks, depending on the size of your lab and how quickly you close findings.
When done right, it’s your final tune-up before showtime.
Step 5 – Application & Pre-Assessment with the Accreditation Body (4–8 Weeks)
Once your internal audit and management review are done, it’s time to bring in the professionals—the accreditation body (AB).
This is the point where everything becomes official. You’ll submit your application, share your scope of accreditation, and start interacting directly with the organization that will eventually accredit your lab.
This step typically takes between four and eight weeks, depending on how quickly documents are reviewed and whether you choose to do a pre-assessment (which I always recommend).
1. Submitting the Application
You’ll send your application package to your chosen accreditation body—SANAS, ANAB, UKAS, NABL, or whichever authority operates in your region.
Expect to include:
-
Your completed application form
-
Scope of accreditation (list of methods or parameters)
-
Quality manual and supporting procedures
-
Staff competence and equipment calibration records
Once submitted, the AB assigns an officer to review your documentation and confirm it’s ready for formal assessment.
Pro tip: Make sure your scope of accreditation is clearly defined and formatted according to the body’s template. Vague or incomplete scopes are the #1 cause of review delays.
2. Document Review
Before any assessors arrive, your accreditation body performs an off-site review.
They’ll examine your quality manual, technical procedures, calibration records, and internal audit reports. If something’s unclear, they’ll send you a “document review report” with questions or corrections to make.
Example:
A small mechanical lab once got delayed three weeks because their uncertainty budgets didn’t match the methods listed in their scope. Once clarified, approval moved quickly.
3. Optional: The Pre-Assessment
Think of the pre-assessment as a friendly rehearsal.
It’s not mandatory, but it’s one of the smartest investments you can make. A technical assessor visits your lab for a day or two to identify potential weaknesses before the official audit.
Here’s what it does for you:
-
Highlights nonconformities early
-
Confirms your audit duration (man-days) and team assignments
-
Clarifies exactly what assessors will focus on
Pro tip: Fixing findings after a pre-assessment is cheaper and faster than fixing them after the real one.
4. Corrective Actions After the Pre-Assessment
If any issues are found, you’ll have a few weeks to close them before the final assessment is scheduled.
Most labs can complete corrections and document updates in two to four weeks, especially if gaps are minor.
Common pitfall: Treating the pre-assessment like an informal visit. Take it seriously—it’s your best opportunity to eliminate surprises later.
Example from the Field
A materials-testing lab I worked with opted for a pre-assessment even though they were confident. The assessor found inconsistencies in traceability documentation for one piece of reference equipment. They corrected it within ten days, and their final audit had zero findings in that area.
Timeline Tip:
This stage usually runs between four and eight weeks, including application review, pre-assessment, and corrective actions.
The faster and more complete your responses, the sooner you’ll be cleared for the final audit.
Step 6 – Final Assessment & Accreditation Decision (6–12 Weeks)
This is it — the stage everything has been building toward: the final accreditation assessment.
If you’ve followed the first five steps carefully, this part won’t be a scramble; it’ll be your chance to prove the system works.
In my experience, labs that go into this stage organized and confident often move from audit to accreditation faster than they ever expected.
1. The On-Site Assessment
Your accreditation body will assign one lead assessor (for management and system review) and one or more technical assessors (for your specific disciplines).
Together, they’ll:
-
Review your documented system in action
-
Observe testing or calibration activities
-
Interview staff on competence and technical understanding
-
Check traceability, calibration records, and uncertainty calculations
Pro tip:
Set aside quiet work areas and make key staff available throughout the audit. Interruptions and delays only lengthen assessor time — and that means higher costs.
Typical duration:
2–4 days for small to medium labs, 5–7 days for larger or multi-scope labs.
2. The Exit Meeting and Nonconformities
At the end of the audit, assessors hold an exit meeting to summarize their findings.
You’ll receive a written report listing:
-
Nonconformities (NCs): Issues that must be corrected before accreditation.
-
Observations: Suggestions for improvement, not mandatory fixes.
-
Strengths: Areas where you demonstrated strong compliance.
Common pitfall:
Arguing findings during the exit meeting instead of understanding them.
Even if you disagree, take notes and request clarification later in writing. Clear communication prevents unnecessary rework.
3. Corrective Actions and Evidence Submission
After the audit, you’ll have 30–60 days (depending on the accreditation body) to close nonconformities and submit evidence of correction.
Examples of evidence:
-
Revised procedures
-
Training records or retraining certificates
-
Calibration certificates or uncertainty reports
-
Corrective action forms with root cause analysis
Pro tip:
Submit clear, concise evidence — not long explanations. Assessors review dozens of reports, and well-organized evidence speeds up approval.
4. Final Review and Accreditation Decision
Once you’ve submitted your corrective actions, your accreditation body’s committee reviews the full package — audit report, corrections, and assessor recommendations.
If everything meets requirements, the committee grants accreditation and issues your ISO/IEC 17025 certificate.
This final review can take 4–8 weeks, depending on the body’s internal schedule.
You’ll then appear in their official directory of accredited laboratories — your hard-earned proof of technical competence.
Example from the Field
A medium-sized testing lab I supported in Singapore completed their final assessment in early April.
They submitted all corrective actions within two weeks, and the committee issued accreditation by mid-May — just six weeks post-audit.
Their success wasn’t luck; it came from tight preparation and quick, evidence-based responses.
Timeline Tip
Expect 6–12 weeks for this entire phase: on-site audit, corrective actions, and final committee approval.
Most of that time depends on how efficiently you respond. Every day saved on corrective actions brings you a day closer to accreditation.
Putting It All Together – The Average ISO/IEC 17025 Accreditation Timeline
By now, you’ve seen how each phase builds on the next — from planning and documentation to training, internal audits, and the final assessment.
When you piece it all together, the full ISO/IEC 17025 accreditation journey typically takes four to seven months for most small to medium-sized labs.
Larger, multi-site or multi-discipline labs may need closer to nine months, depending on complexity and how quickly corrective actions are implemented.
Here’s a breakdown to help you visualize the process.
ISO/IEC 17025 Accreditation Timeline Summary
| Stage | Main Activities | Estimated Duration |
|---|---|---|
| Step 1: Preparation & Gap Analysis | Review existing system, identify gaps, plan updates | 2–4 weeks |
| Step 2: Documentation & Implementation | Develop or refine QMS documents, implement forms | 6–10 weeks |
| Step 3: Staff Training & Competency Verification | Train team, verify technical competence, record evidence | 2–4 weeks |
| Step 4: Internal Audit & Management Review | Conduct audits, resolve findings, complete management review | 3–4 weeks |
| Step 5: Application & Pre-Assessment | Submit application, document review, optional pre-assessment | 4–8 weeks |
| Step 6: Final Assessment & Accreditation Decision | On-site audit, corrective actions, committee decision | 6–12 weeks |
| Total Estimated Duration | — | 4–7 months typical |
What Affects the Total Time
-
Lab readiness: The cleaner your system, the faster every stage moves.
-
Accreditation body backlog: Scheduling assessors can delay audits during peak seasons.
-
Scope complexity: Multi-discipline labs require more assessor days.
-
Corrective action speed: Quick, complete responses can shave weeks off your total timeline.
Example from the Field
A small calibration lab with three staff and a single-discipline scope completed their entire accreditation in five months:
-
Two weeks for gap analysis
-
Six weeks to finalize documentation and training
-
Three weeks for internal audit and review
-
One month for pre-assessment and corrections
-
Final audit and approval in just under two months
That’s a realistic, well-executed pace—and they didn’t rush a single step.
Pro tip:
Plan your project using a visual Gantt chart or timeline tracker.
Seeing how each stage overlaps helps you balance documentation, training, and audit preparation efficiently.
Bottom line:
ISO/IEC 17025 accreditation isn’t a sprint—it’s a structured process.
But with focus, clear milestones, and consistent follow-through, your lab can earn accreditation smoothly and confidently within a realistic timeframe.
FAQs – ISO/IEC 17025 Accreditation Timeline
Even with a clear roadmap, labs still have plenty of questions about how long things really take.
Here are the most common ones I hear — and the straight answers that’ll help you plan with confidence.
1. Can the ISO/IEC 17025 process be completed faster than six months?
Yes — but only if you start prepared.
Labs that already have a working quality system (for example, ISO 9001-based) or use a ready-to-adapt documentation package can often get accredited in as little as 3–4 months.
The real time-saver is organization, not shortcuts. When your documents are complete, your staff trained, and your internal audits done right, you remove 80% of the usual delays.
2. What causes the biggest delays in the accreditation timeline?
There are a few usual suspects:
-
Incomplete or inconsistent documentation
-
Slow responses to corrective actions after audits
-
Scheduling backlogs with the accreditation body
-
Expanding the scope mid-way through the process
Pro tip: Avoid changing your scope after application — it resets the review and extends the audit schedule.
3. When should I contact the accreditation body?
Ideally, right after your internal audit and management review are complete.
That’s the point when your system is stable and ready for external review.
Contacting them too early can waste weeks waiting for readiness, while contacting too late can push your slot behind other applicants.
4. How long is accreditation valid once approved?
ISO/IEC 17025 accreditation typically lasts four years, with annual or biannual surveillance audits in between.
Your next big reassessment usually happens near the end of the fourth year.
The better you maintain your system, the easier and shorter those follow-ups become.
5. Do pre-assessments add time to the process?
Technically yes — but in practice, they save time overall.
A pre-assessment adds 1–2 weeks upfront but can prevent 4–6 weeks of rework after the main audit.
Think of it as an investment that identifies problems early, while they’re still easy (and cheap) to fix.
6. Can I work with clients while I’m in the accreditation process?
Absolutely. Many labs continue operating normally throughout implementation.
Just make sure to label results clearly as non-accredited until the official approval date — that’s an ISO/IEC 17025 requirement.
Bottom line:
Accreditation timelines vary, but they’re always manageable when you plan ahead, keep momentum, and respond quickly at each step.
A lab that owns its schedule never feels rushed — it feels in control.
Plan the Timeline, Control the Outcome
Earning ISO/IEC 17025 accreditation isn’t just about passing an audit — it’s about building competence, credibility, and consistency into every part of your laboratory.
And like any solid system, it takes time. But when you understand what each stage requires, that time becomes manageable — even predictable.
In my experience, the labs that finish on time share one thing in common: they plan their timeline as seriously as their quality system.
They know what to do each week, track milestones, and fix issues before they snowball into delays. They don’t rush — they stay steady.
Key Takeaways
-
Four to seven months is a realistic window for most labs.
-
A structured six-step timeline keeps you focused: from gap analysis to final approval.
-
The biggest delays come from unclear scope, incomplete documents, and slow corrective actions — all avoidable with planning.
-
Pre-assessments and internal audits are your best insurance against surprises.
-
Every hour spent preparing early saves days (and sometimes weeks) later.
Final Thought
Accreditation isn’t luck — it’s a project.
If you treat it like one, with timelines, accountability, and structure, you’ll not only earn your ISO/IEC 17025 certificate faster, but you’ll build a lab culture that runs smoother, audits cleaner, and wins client trust naturally.
If you’re ready to fast-track your accreditation timeline, QSE Academy offers tools that make it easy —
from ISO/IEC 17025 Documentation Packages to a Timeline Planner and Implementation Checklist built specifically for labs like yours.
Start your plan today, follow the six steps, and take full control of your accreditation journey.
I hold a Master’s degree in Quality Management, and I’ve built my career specializing in the ISO/IEC 17000 series standards, including ISO/IEC 17025, ISO 15189, ISO/IEC 17020, and ISO/IEC 17065. My background includes hands-on experience in accreditation preparation, documentation development, and internal auditing for laboratories and certification bodies. I’ve worked closely with teams in testing, calibration, inspection, and medical laboratories, helping them achieve and maintain compliance with international accreditation requirements. I’ve also received professional training in internal audits for ISO/IEC 17025 and ISO 15189, with practical involvement in managing nonconformities, improving quality systems, and aligning operations with standard requirements. At QSE Academy, I contribute technical content that turns complex accreditation standards into practical, step-by-step guidance for labs and assessors around the world. I’m passionate about supporting quality-driven organizations and making the path to accreditation clear, structured, and achievable.
Related Posts